Selenium Webdriver on Headless Ubuntu
Table of Content
Launch Selenium Webdriver on Headless Ubuntu
Connect to your VM via SSH
Run our sample code and develop your own scripts
Deploy files on your VM remotely
Run Scripts in the Background After Closing the SSH Window
Troubleshooting
Launch Selenium Webdriver on Headless Ubuntu
Navigate to our listing page on the AWS Marketplace and click 'Continue to Subscribe'.

On the subsequent page, review and accept our terms by selecting 'Accept Terms'.
Once the subscription process is complete, select 'Continue to Configuration'.
Choose the region where you wish to deploy the virtual machine, then click 'Continue to Launch'.
On the final page, select the instance type you wish to use (the recommended instance type is pre-selected) and review the other launch options. Then, click 'Launch'.
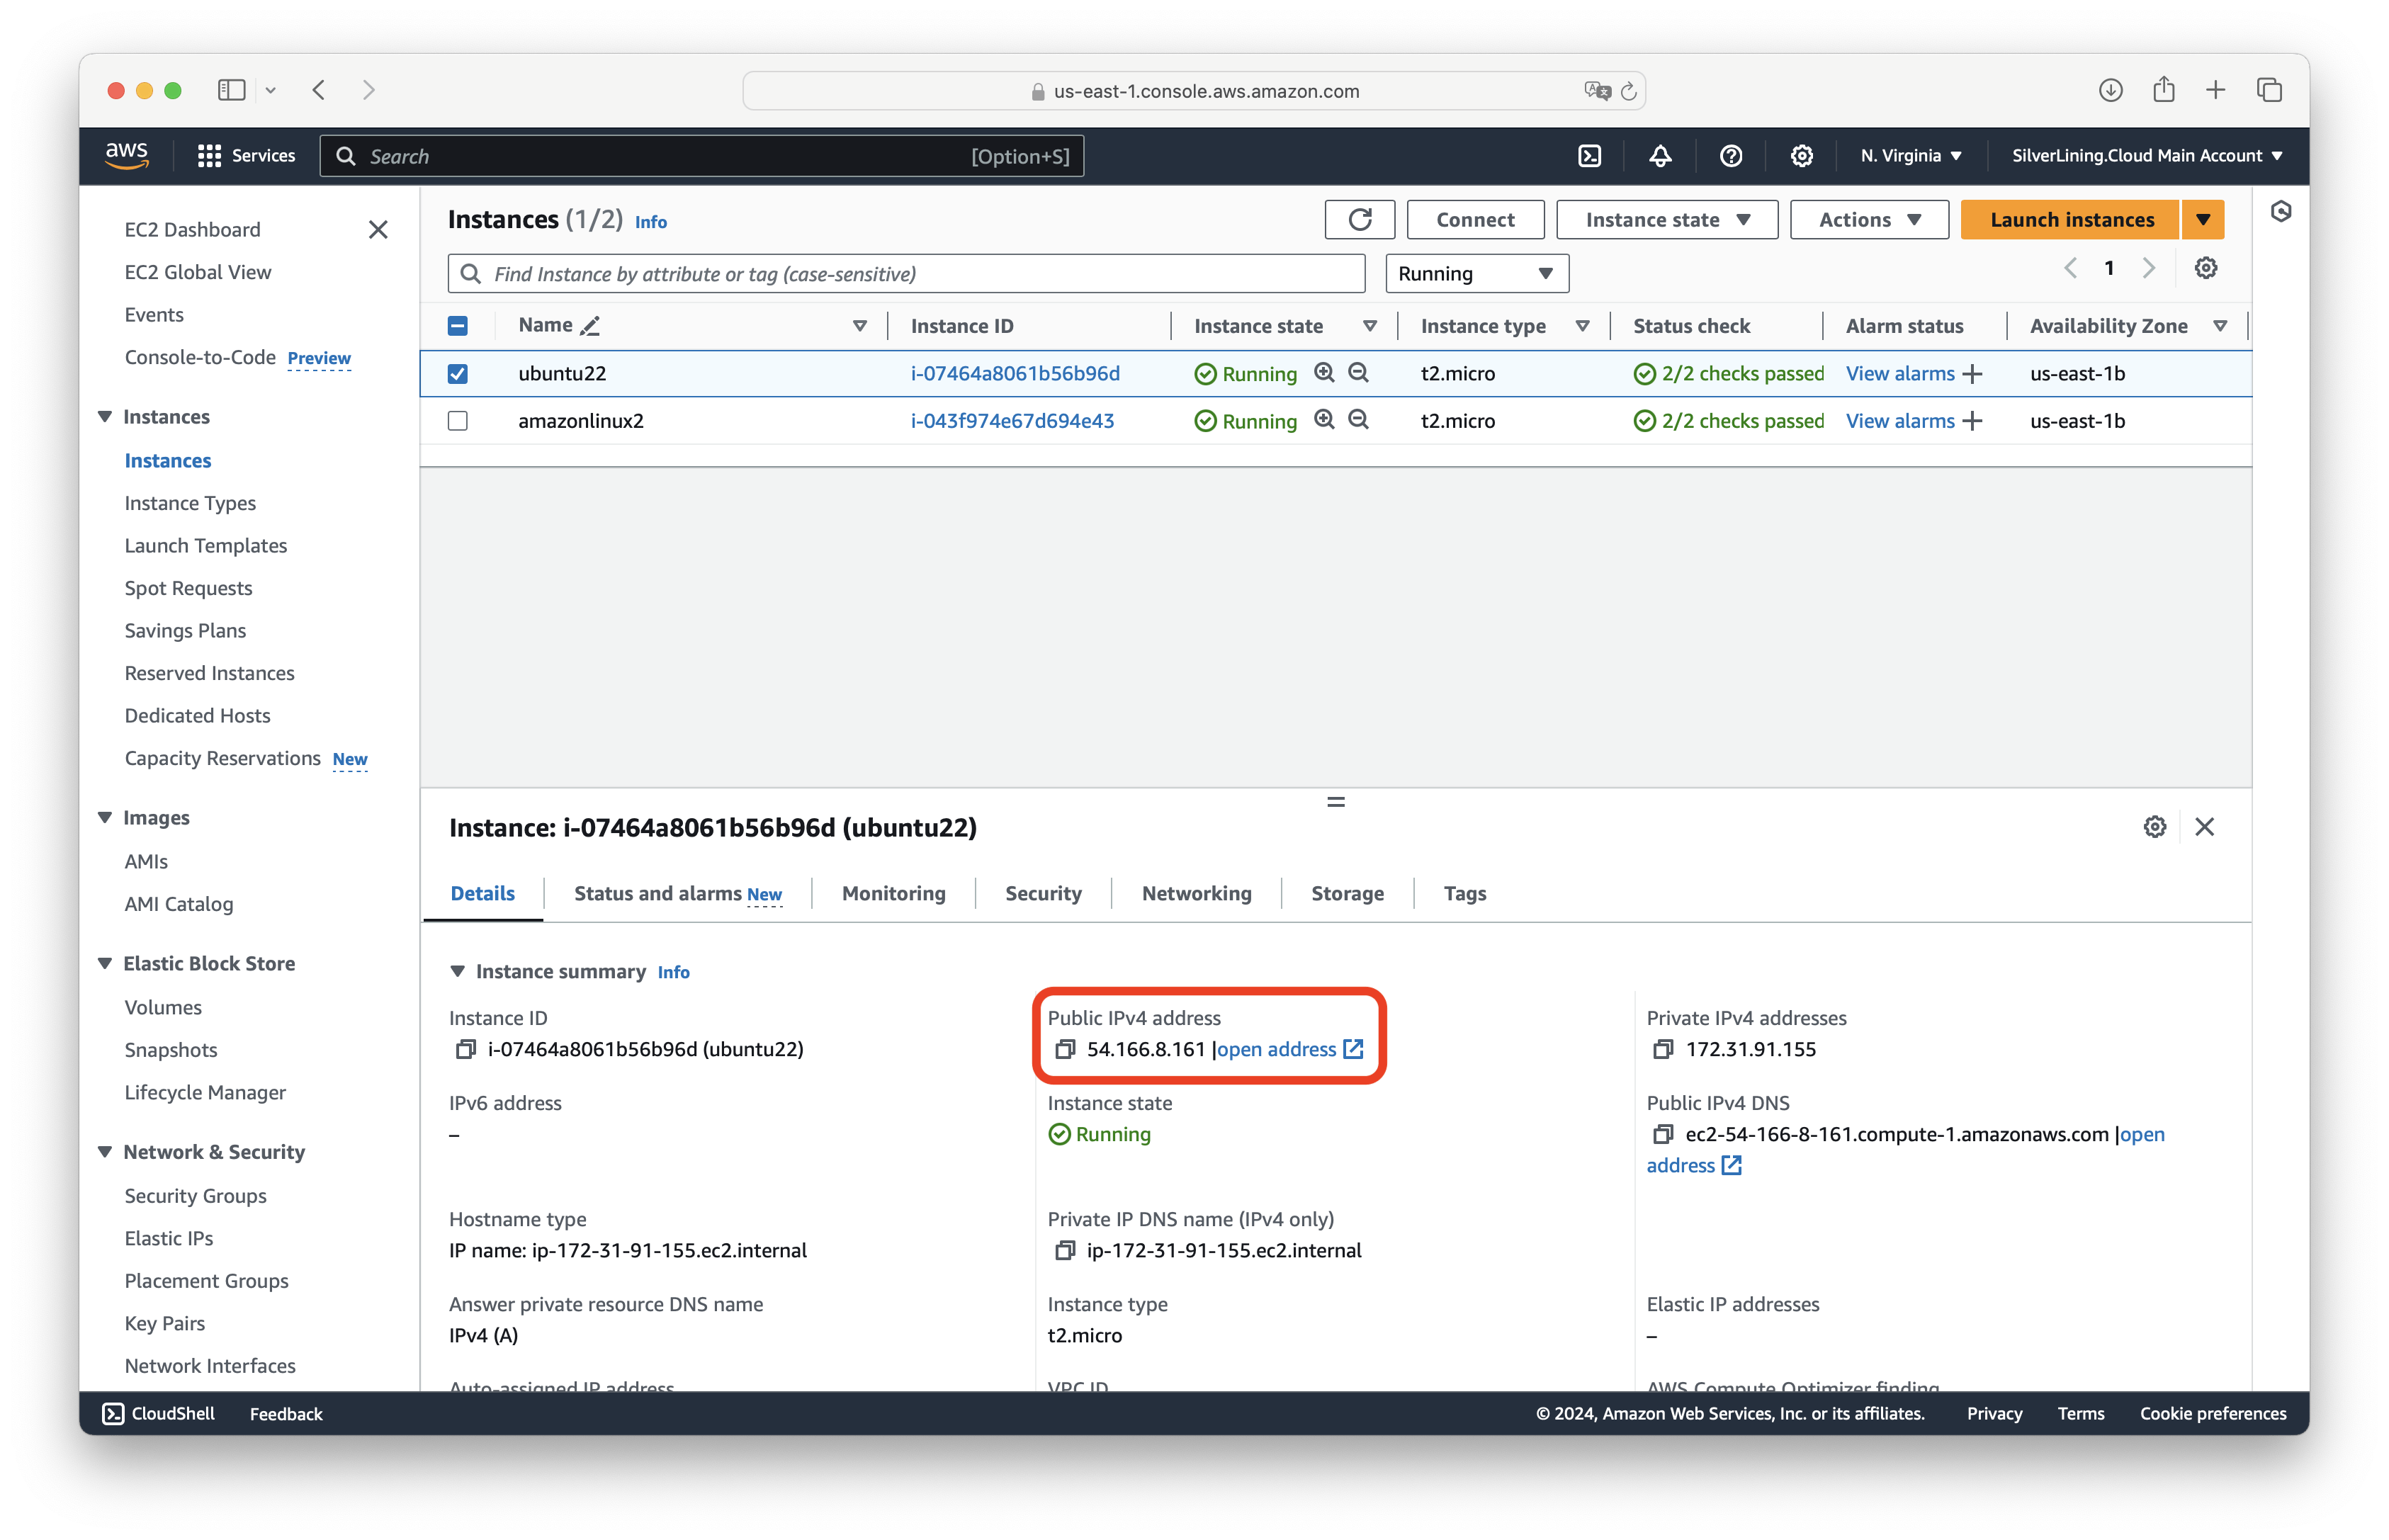
After launching, you can view your instance in the EC2 Management Console.
Connect to your VM via SSH
Please see the official documentation for detailed instructions on how to connect to a virtual machine with SSH.
Go to the EC2 Management Console and select the virtual machine to obtain its Public IPv4 address.
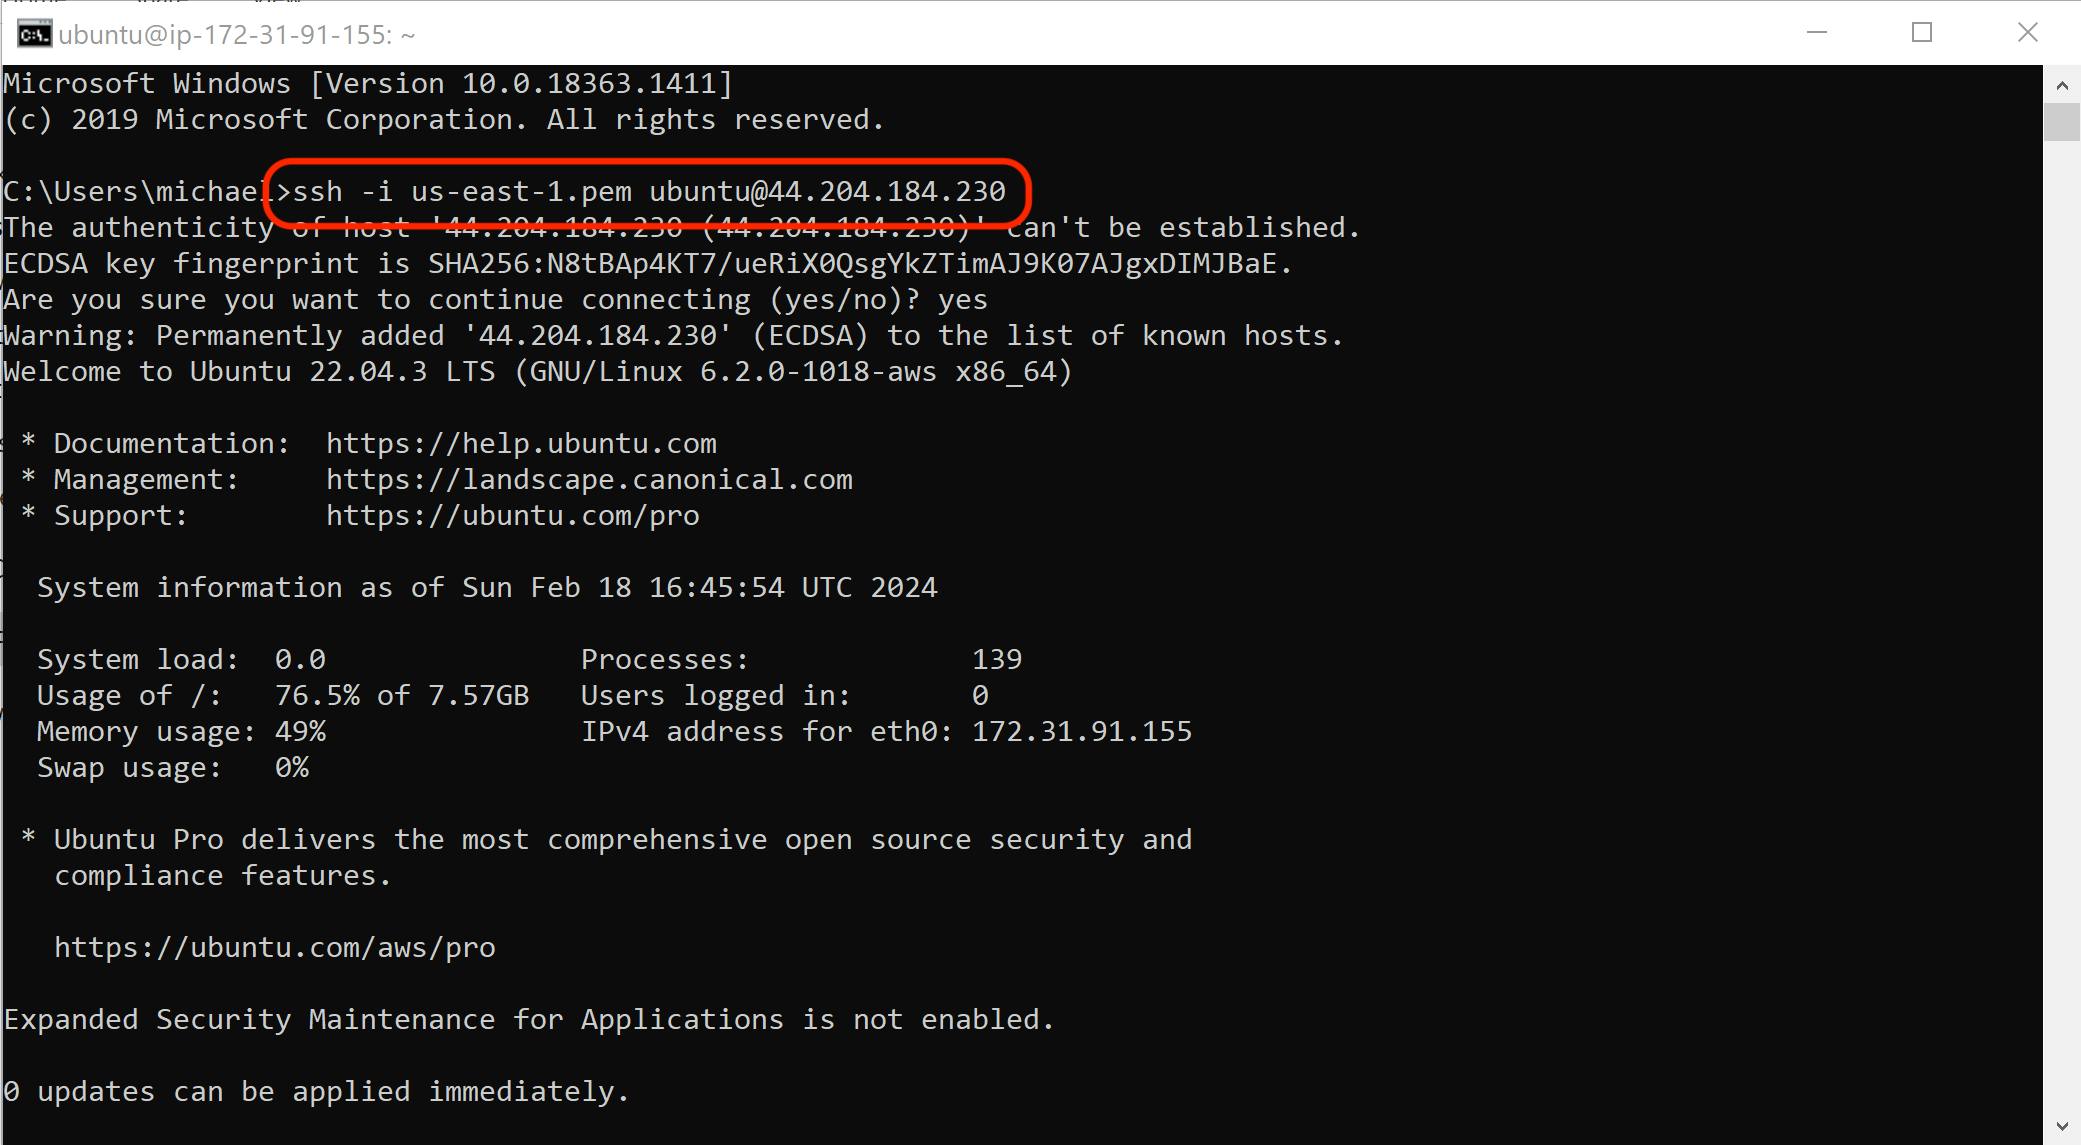
Open a Command Prompt / Terminal window and navigate to the directory where your created .pem key file is located. You can connect to your VM with the user 'ubuntu' by executing the following command:
ssh -i <name-of-key-file.pem> ubuntu@<public-ip>
Run our sample code and develop your own scripts
Connect to the terminal via SSH and log in as the user 'ubuntu'.
Navigate to the /home/ubuntu/Selenium/Python directory by using the command:
cd /home/ubuntu/Selenium/Python
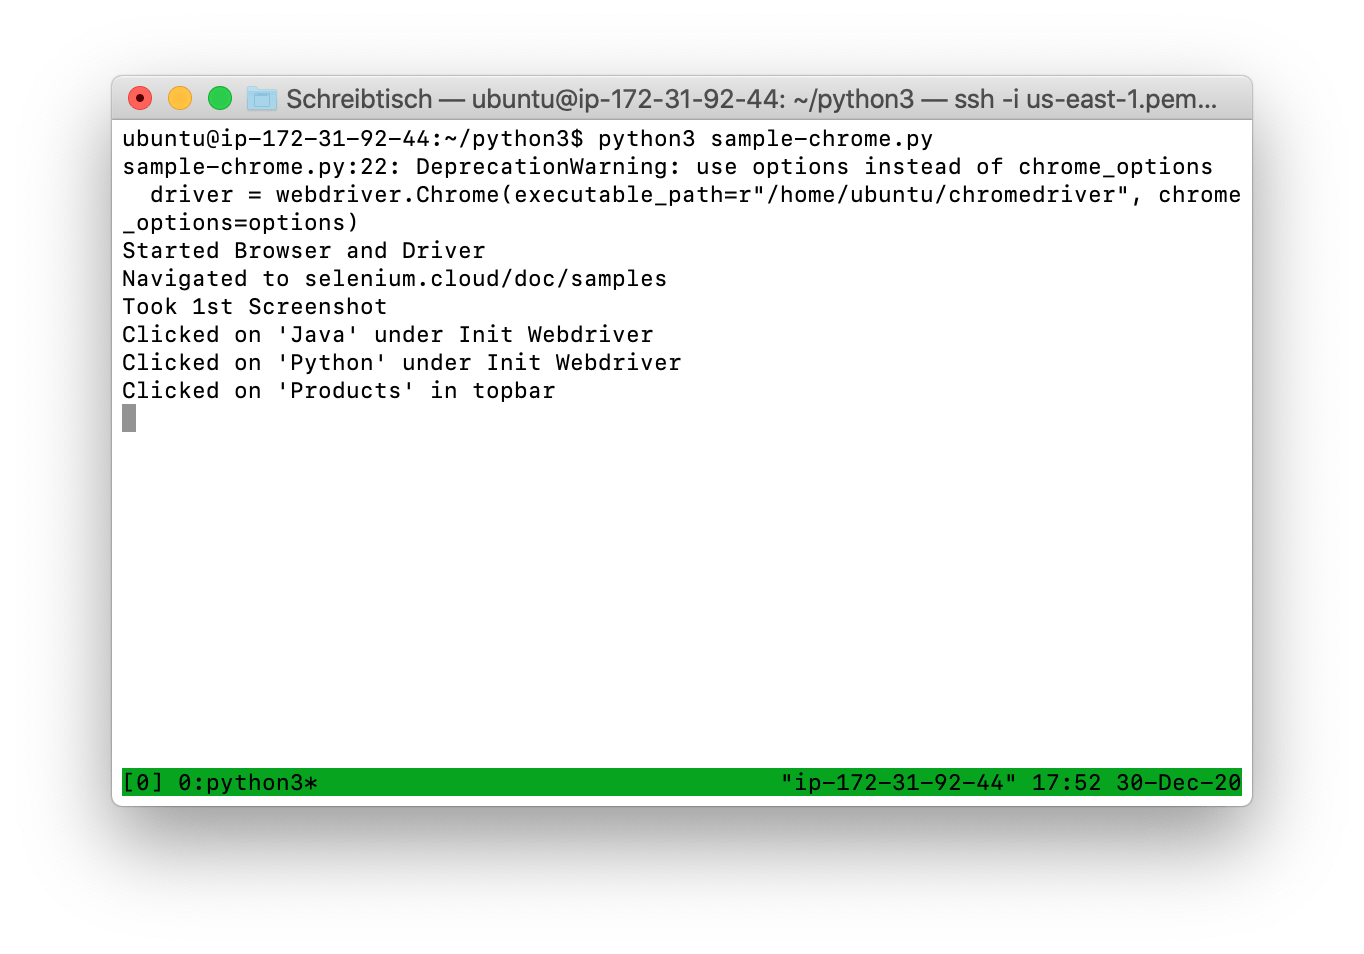
To run the sample code for Chrome, enter:
python3 sample-chrome.py
To run the sample code for Firefox, enter:
python3 sample-firefox.py
To run the sample code for Edge, enter:
python3 sample-edge.py
Please note that the initial browser launch after a fresh startup may take longer, especially on virtual machines with limited memory. Performance will improve with subsequent launches.
After a successful run, you will see:

You can find the taken screenshots using the command:
ls /home/ubuntu/Selenium
Edit files by using:
nano sample-chrome.py
Alternatively, you can deploy script files remotely.
Run the modified scripts again with the command:
python3 sample-chrome.py
Deploy files on your VM remotely
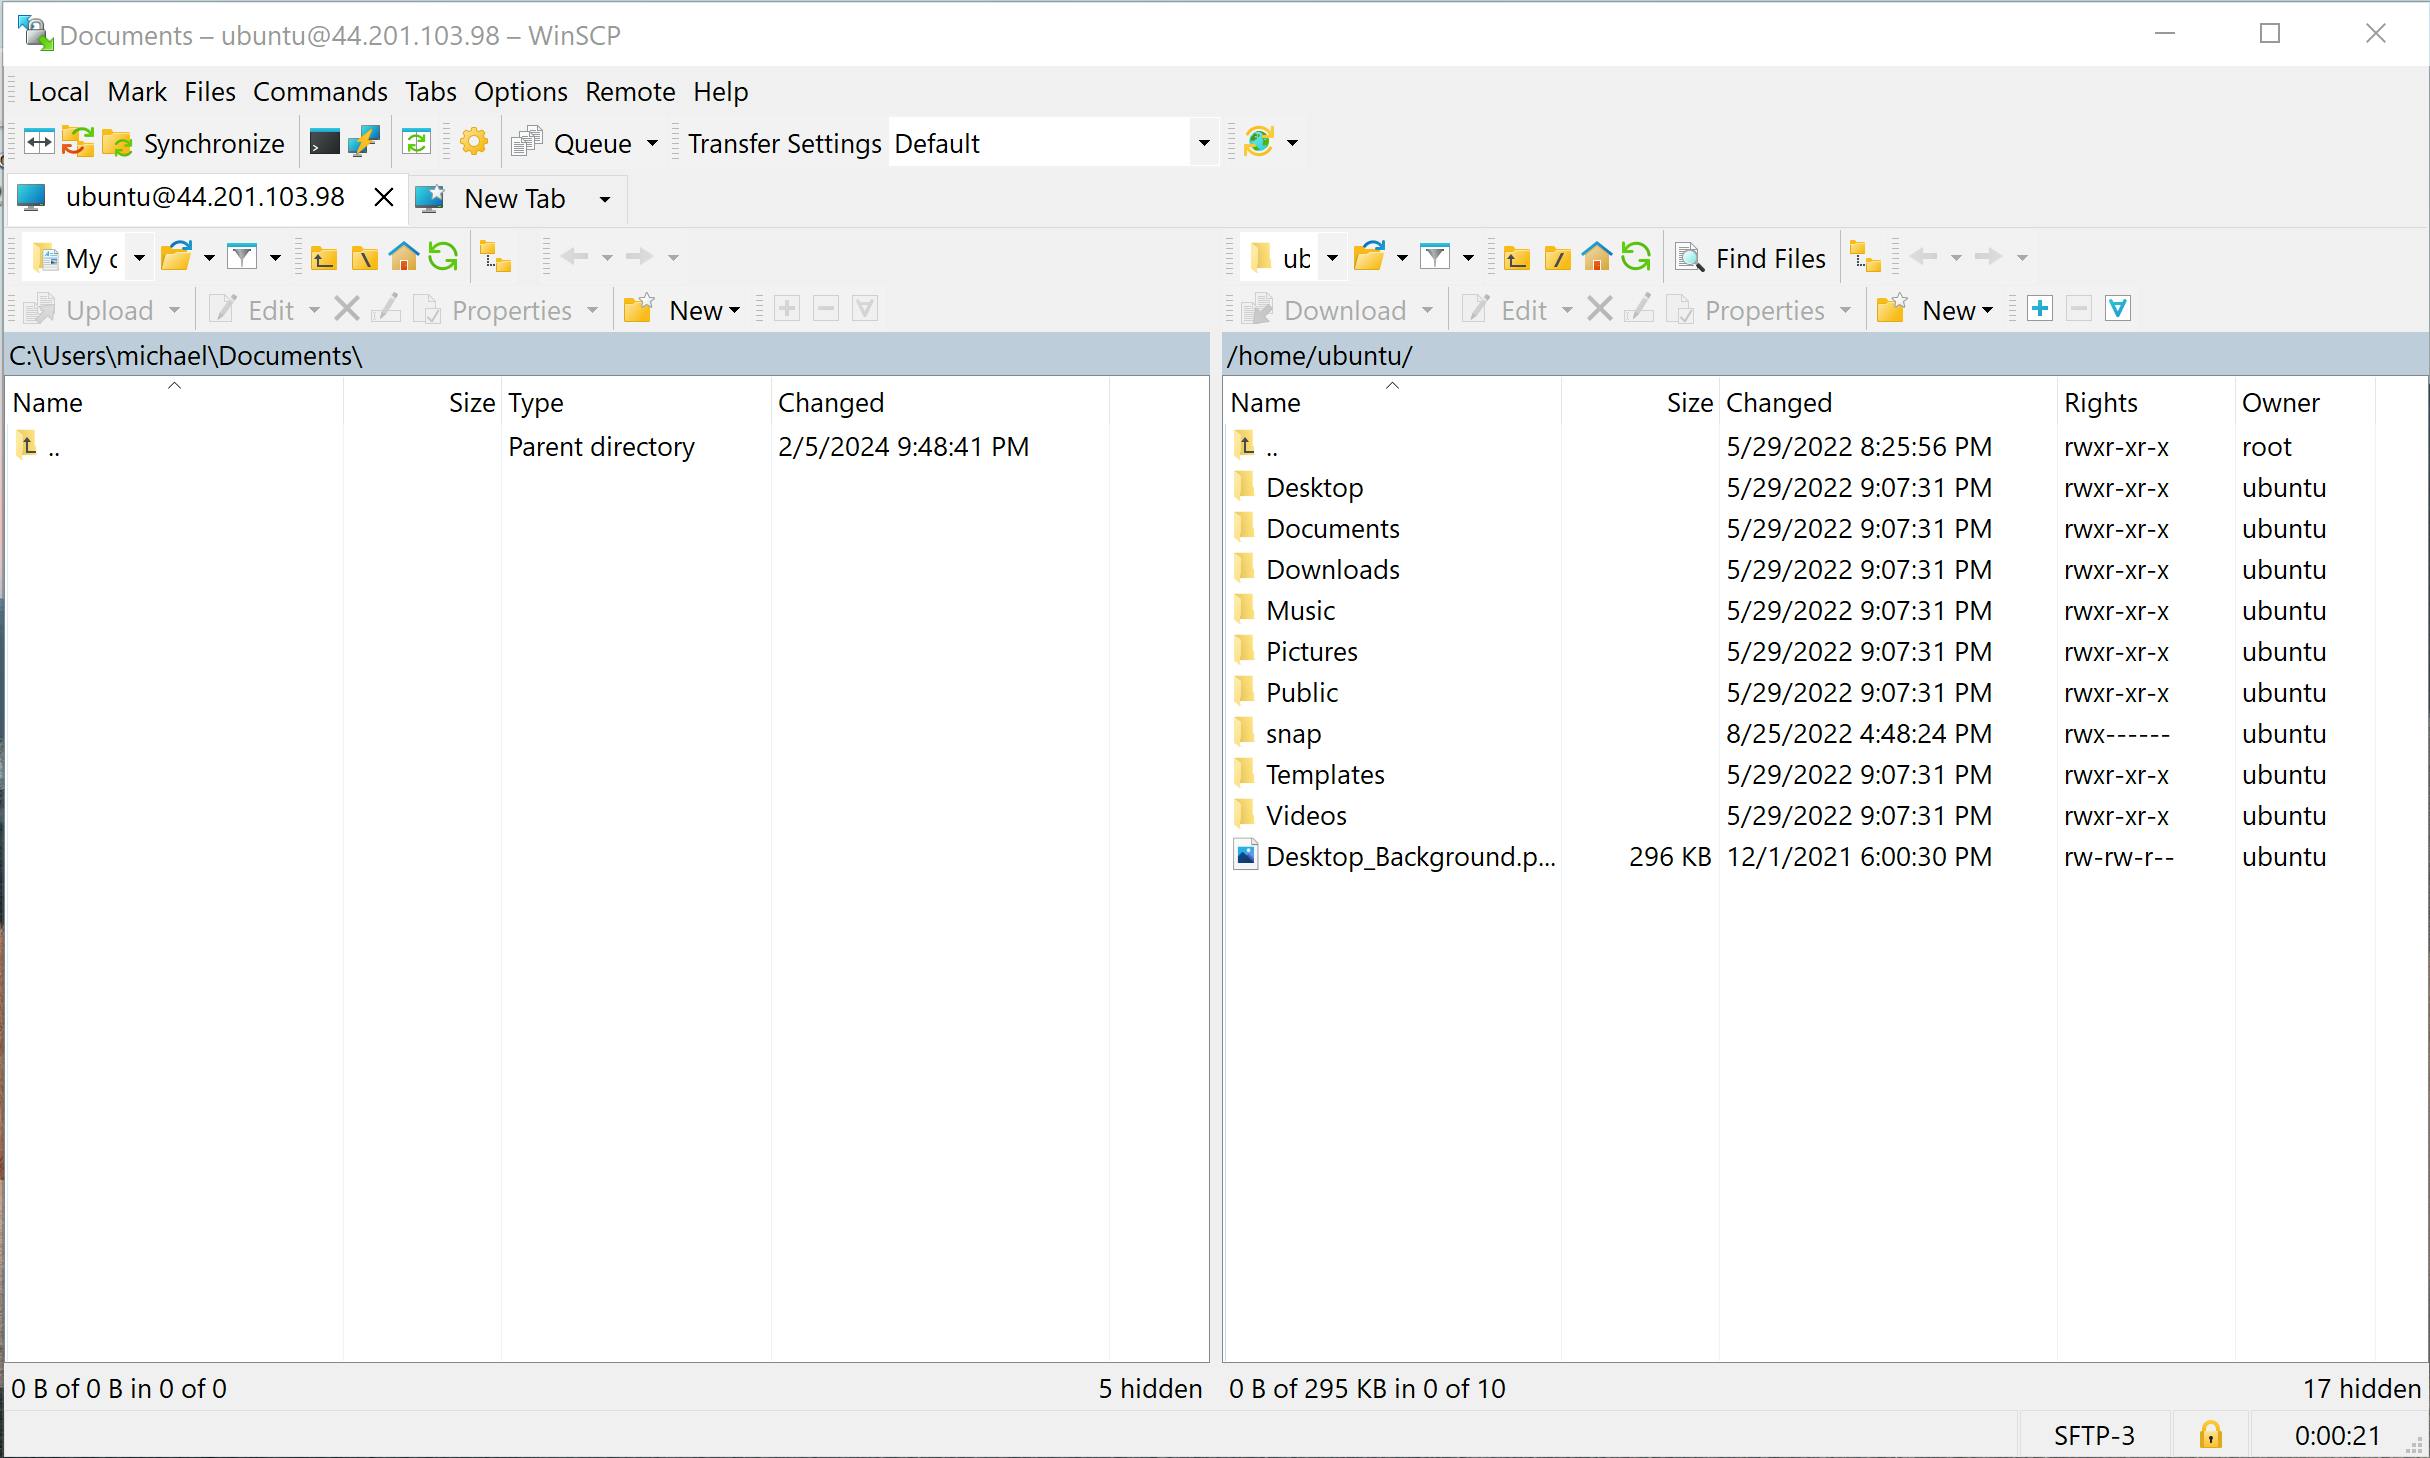
Download and install WinSCP or any other SCP client of your choice.
Choose 'SFTP' as the file protocol and enter the public IP address of your instance, using 'ubuntu' as the username.

Click on 'Advanced'.
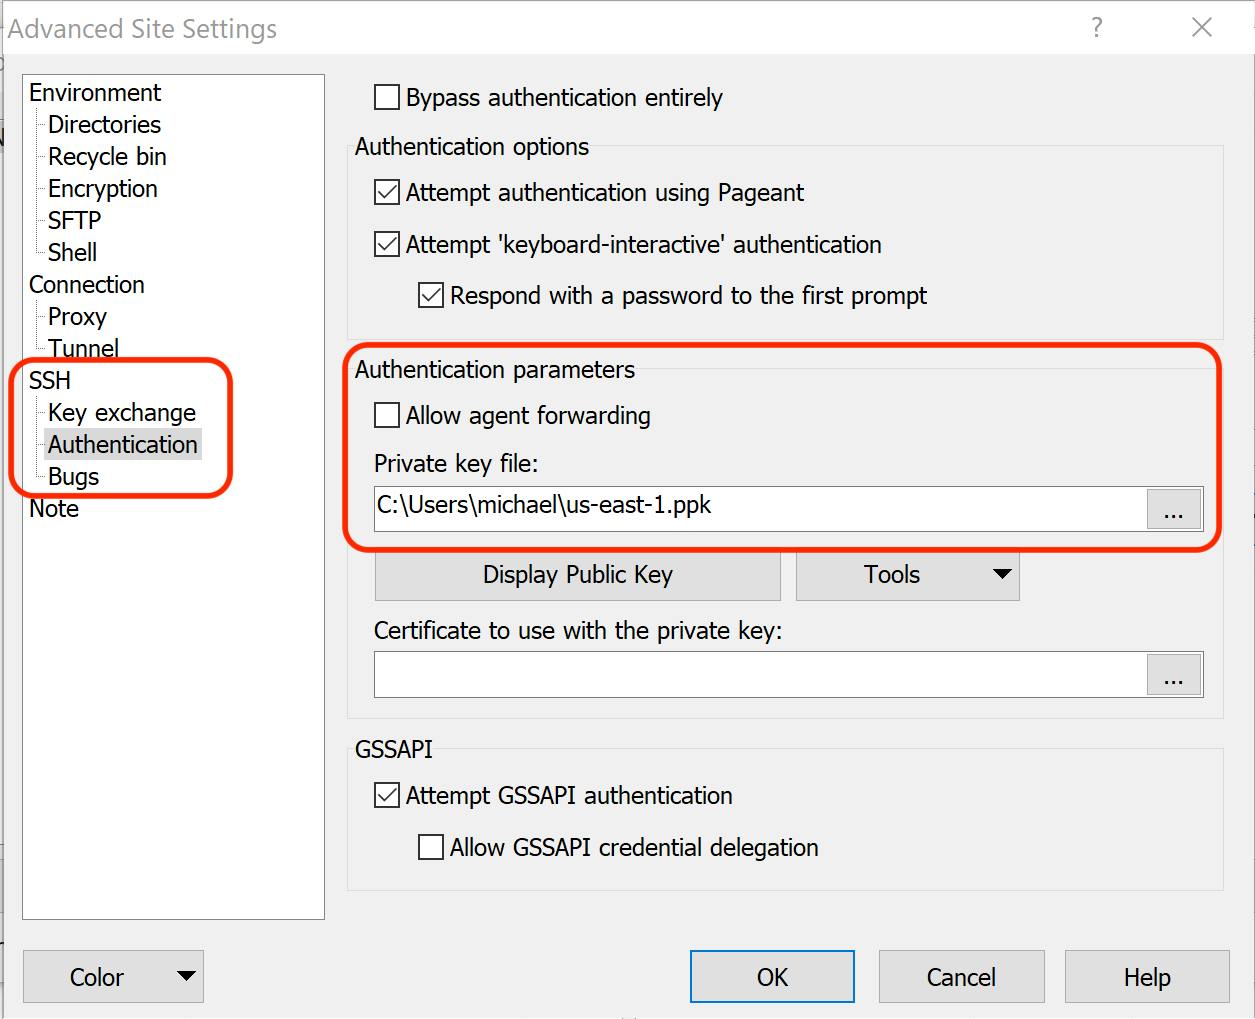
In the left-side menu, select 'Authentication'. Under Authentication parameters, select the key file you created when you launched the virtual machine. When prompted, convert the .pem key file to PuTTY format.
Close the Authentication window by clicking on 'OK', and connect to the virtual machine by clicking on 'Login'.
Run Scripts in the Background After Closing the SSH Window
Connect to the terminal via SSH by logging in with "ubuntu", refer to the chapter 'Connect to Your VM via SSH'.
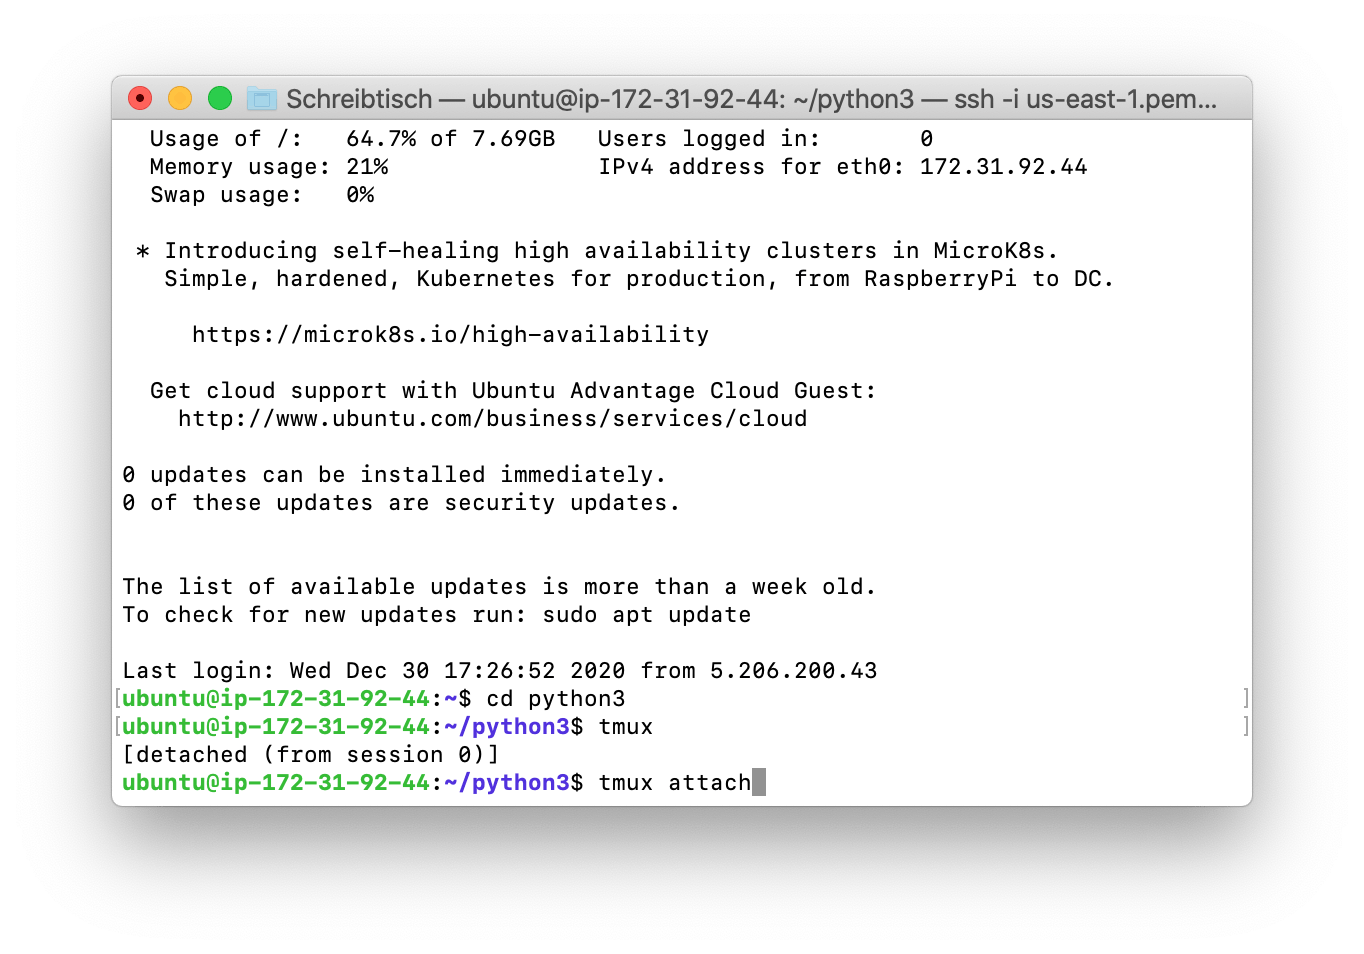
Start a new tmux session by entering the following command:
tmux
Start the script you wish to run in the background.
To detach the tmux session while keeping your script running in the background, press CTRL+b followed by d. You can now safely close the SSH session; your script will continue to run inside tmux.
To resume your tmux session at any time, use the command:
tmux attach
Troubleshooting
How can I cancel my subscription?
To cancel your subscription, follow these steps:
- Go to the AWS Marketplace Console at https://aws.amazon.com/marketplace/library. Ensure that you are logged into the account that is subscribed to the product you want to cancel.
- Find the product you want to cancel and click on 'Manage.'
- Click on 'Actions' and then select 'Cancel subscription.'
For more detailed instructions, visit the AWS Marketplace Buyer Guide at https://docs.aws.amazon.com/marketplace/latest/buyerguide/cancel-subscription.html.