Selenium with Tor Browser on Ubuntu with GUI
Table of Content
Launch Selenium with Tor Browser on Ubuntu with GUI
Connect to GUI (RDP and VNC)
Run our sample code and develop your own scripts
Connect to your VM via SSH
Deploy files on your VM remotely
Configure GUI
Troubleshooting
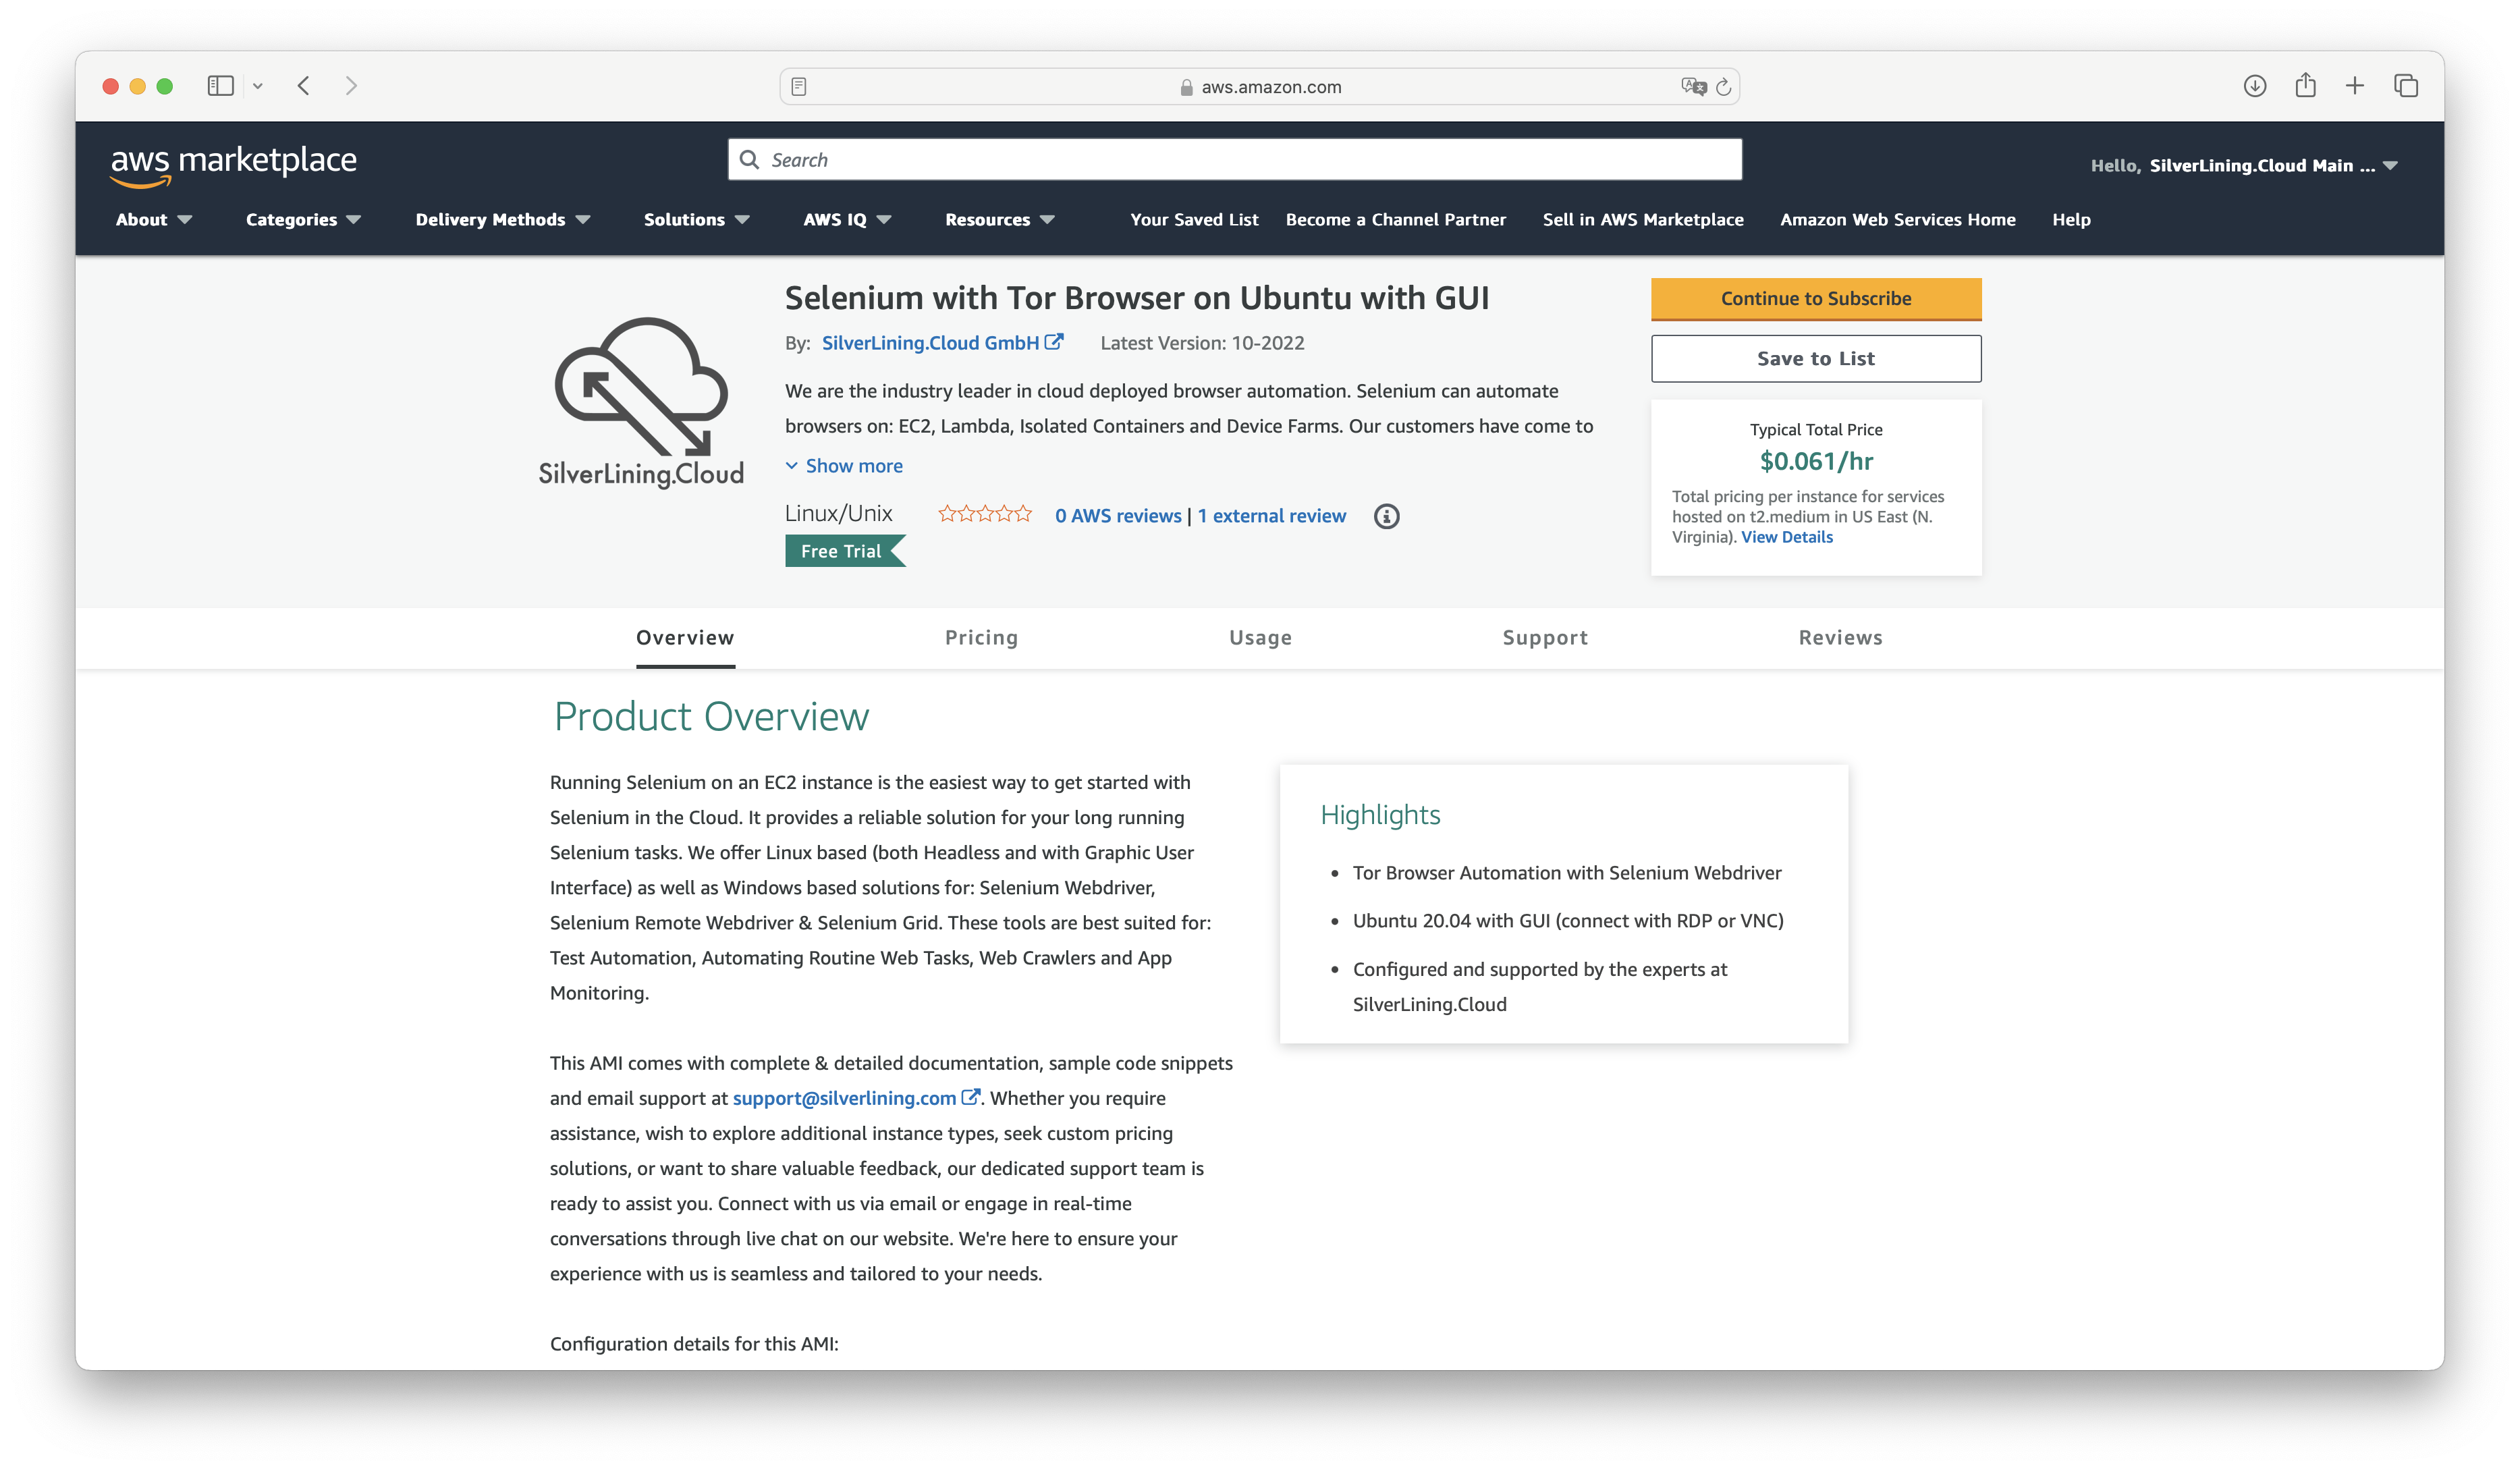
Launch Selenium with Tor Browser on Ubuntu with GUI
Navigate to our listing page on the AWS Marketplace and click 'Continue to Subscribe'.
On the subsequent page, review and accept our terms by selecting 'Accept Terms'.
Once the subscription process is complete, select 'Continue to Configuration'.
Choose the region where you wish to deploy the virtual machine, then click 'Continue to Launch'.
On the final page, select the instance type you wish to use (the recommended instance type is pre-selected) and review the other launch options. Then, click 'Launch'.
After launching, you can view your instance in the EC2 Management Console.
Connect to GUI (RDP and VNC)
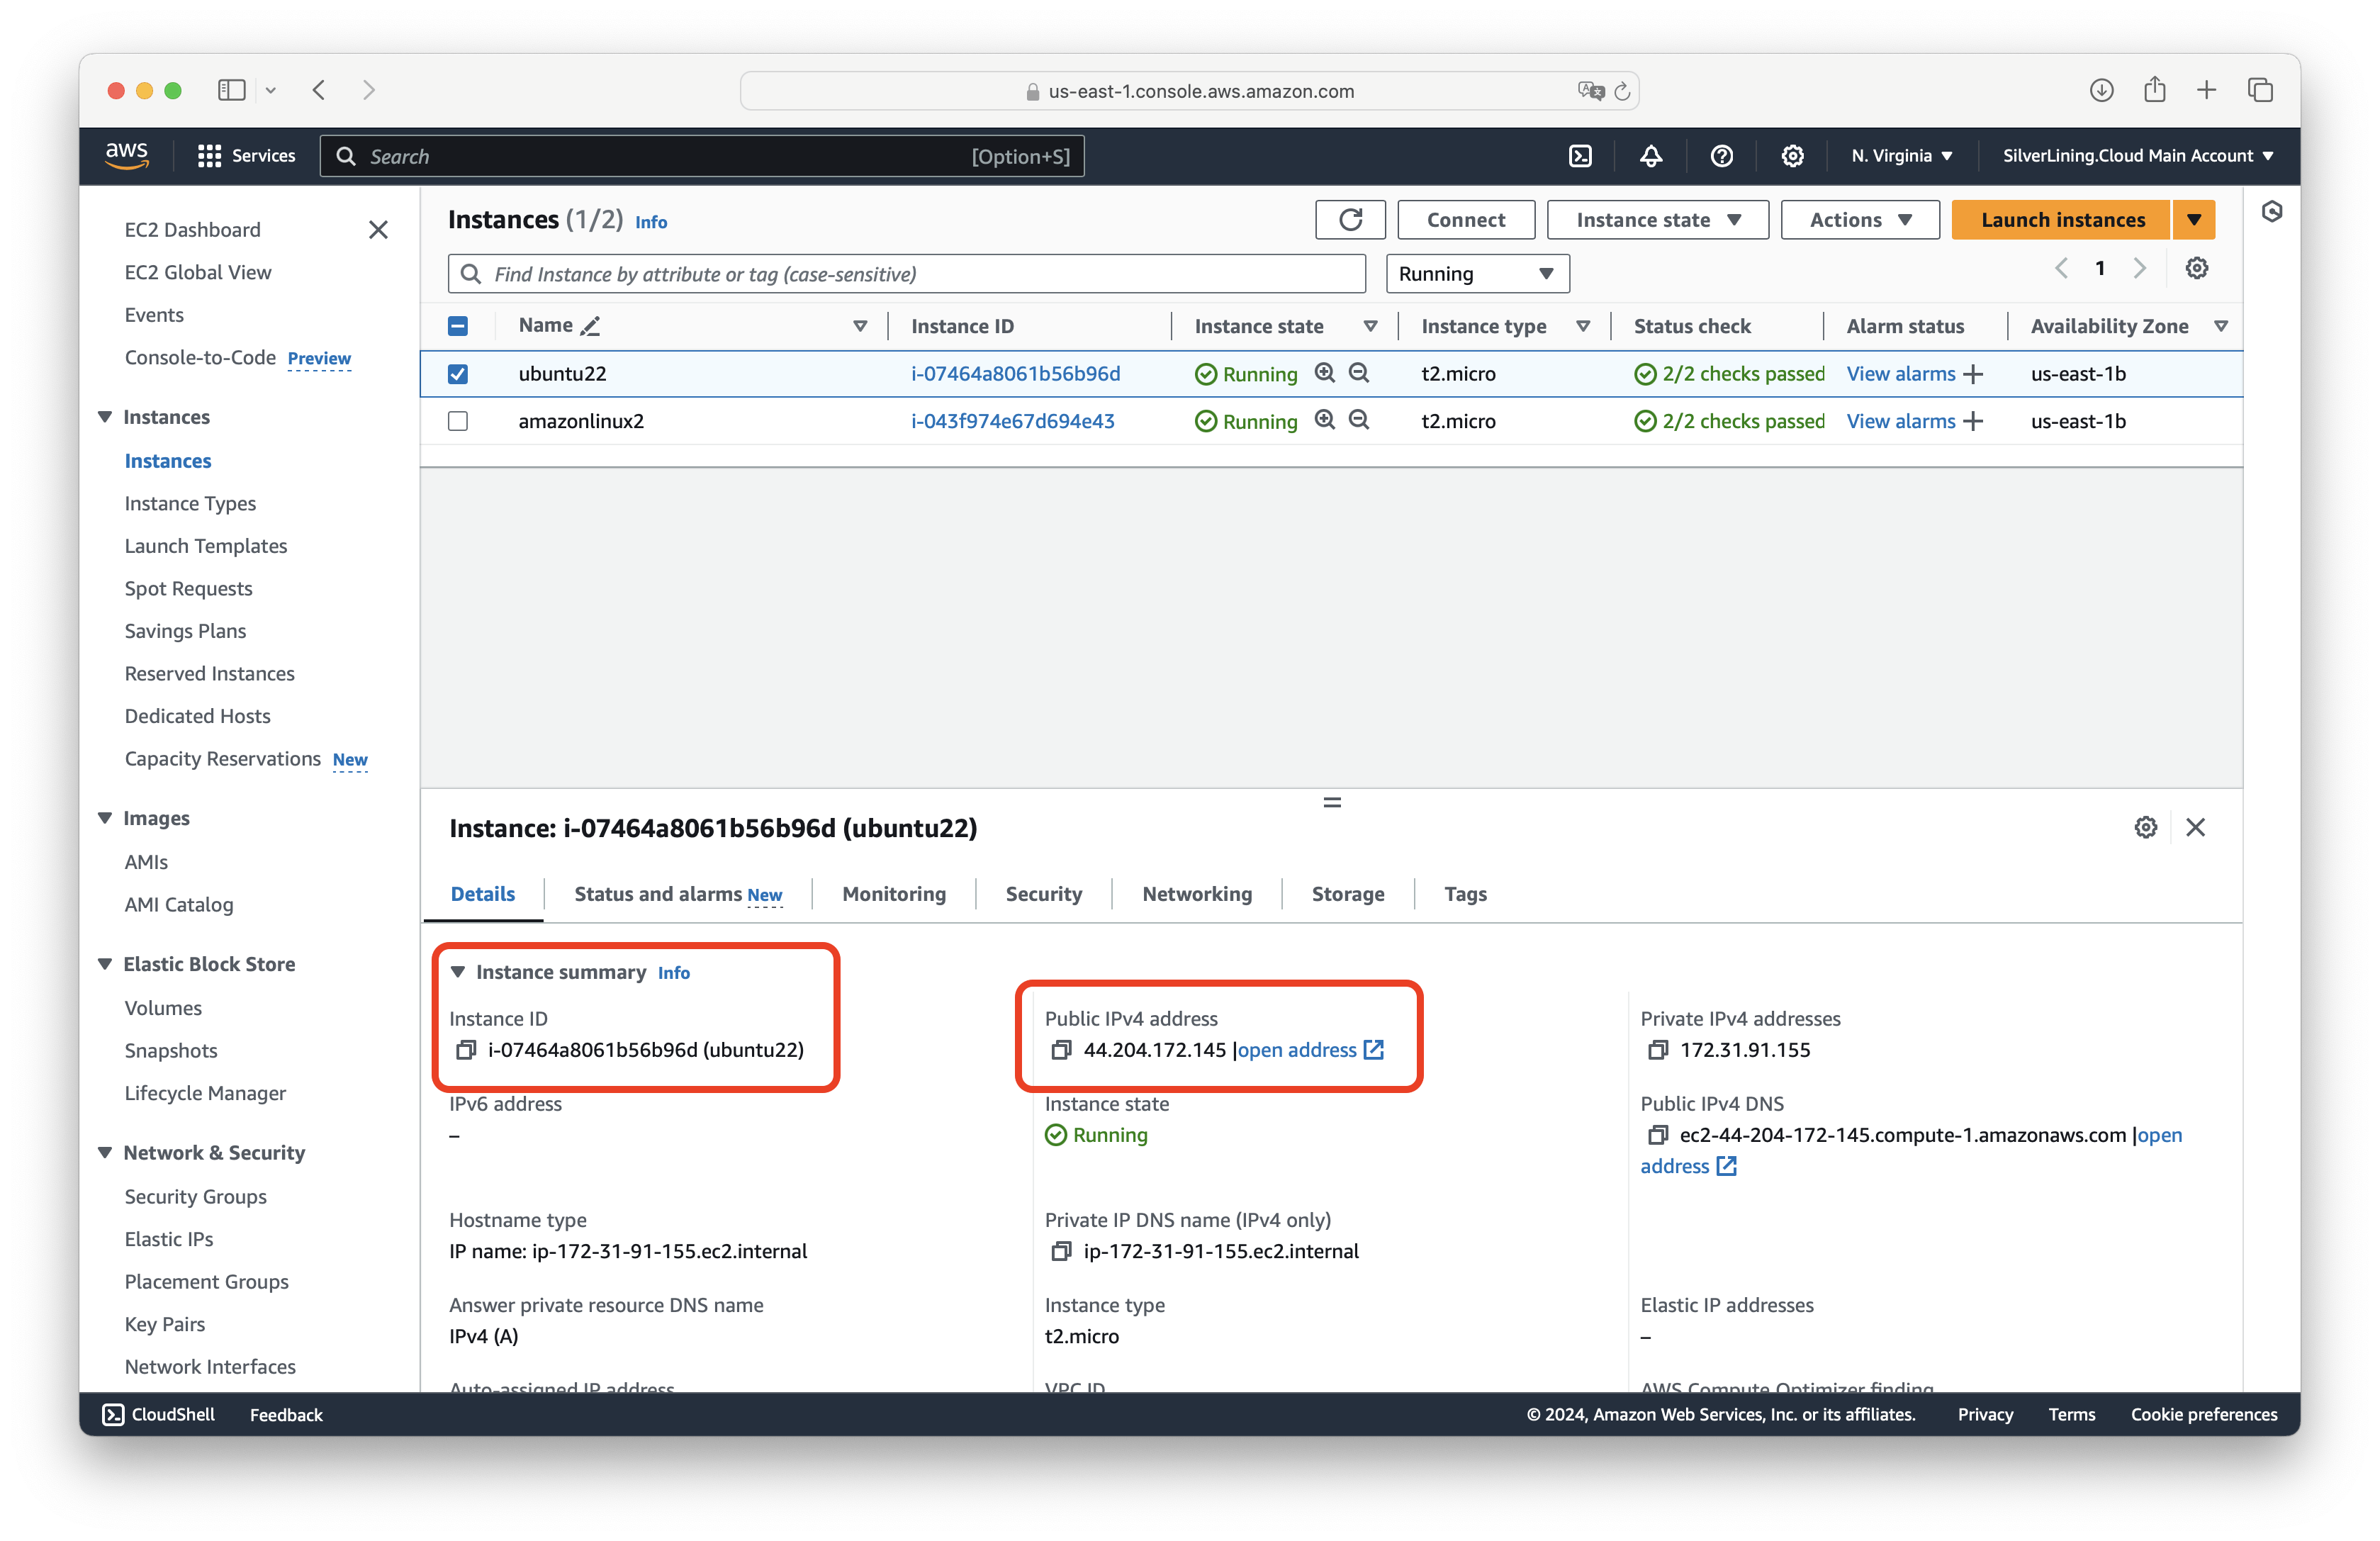
Access the EC2 Management Console (ensure to be in the correct AWS region) to retrieve the public IP address of your virtual machine. For the VNC connection, use the instance ID as the password (e.g. i-0a85cdce733efbb08). The username to use is 'ubuntu'.
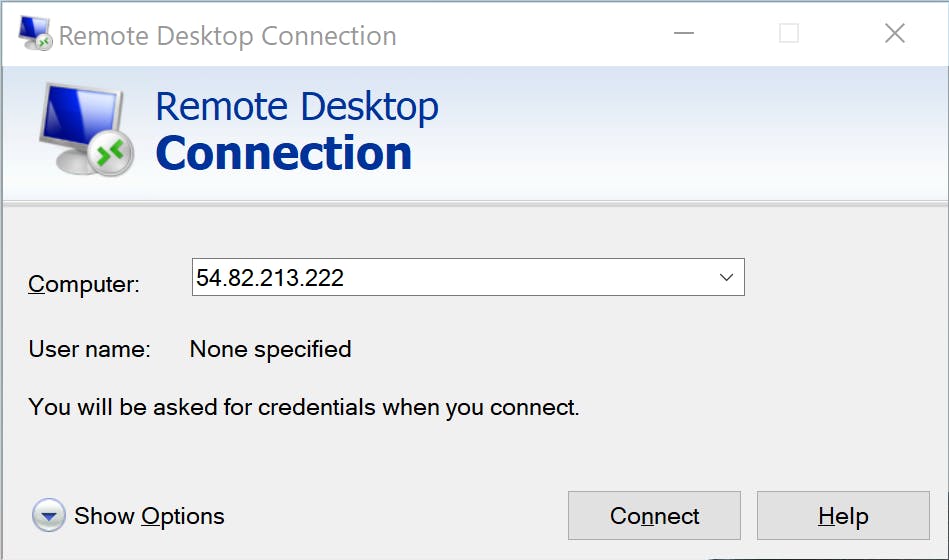
Open 'Remote Desktop Connection' and connect by using the public IP address of your virtual machine.
Important: Expand "More Options" and select "Allow me to save credentials" to ensure the Remote Desktop Connection prompts you for a password before connecting.
When prompted, enter 'ubuntu' as the username and the instance ID of your virtual machine as the password (please refer to the previous steps).
If you see the screen below, the login attempt has failed, usually due to an incorrect password. You can re-enter the password on this screen, but please note that the keyboard layout on this login page is set to English. Special characters may appear differently because of your physical keyboard's layout. Since the password is the instance ID of your EC2 instance, keep in mind that the hyphen ("-") in the instance ID (e.g., "i-0abc...") may be in a different location on an English keyboard - it’s usually next to the "0" (zero) key on the right. We recommend setting the password directly in the RDP client (see the "Connect to GUI"

Run our sample code and develop your own scripts
Connect to the instance with RDP or VNC.
First, open the Tor browser to establish a connection to the Tor network. Launch the browser by clicking on its menu item, then connect to the Tor network. Keep the browser window open in the background while proceeding with the next steps.


Next, launch Visual Studio Code and open the script.py file. Run the sample script by clicking on Run and executing it, either with or without debugging.

Connect to your VM via SSH
Please see the official documentation for detailed instructions on how to connect to a virtual machine with SSH.
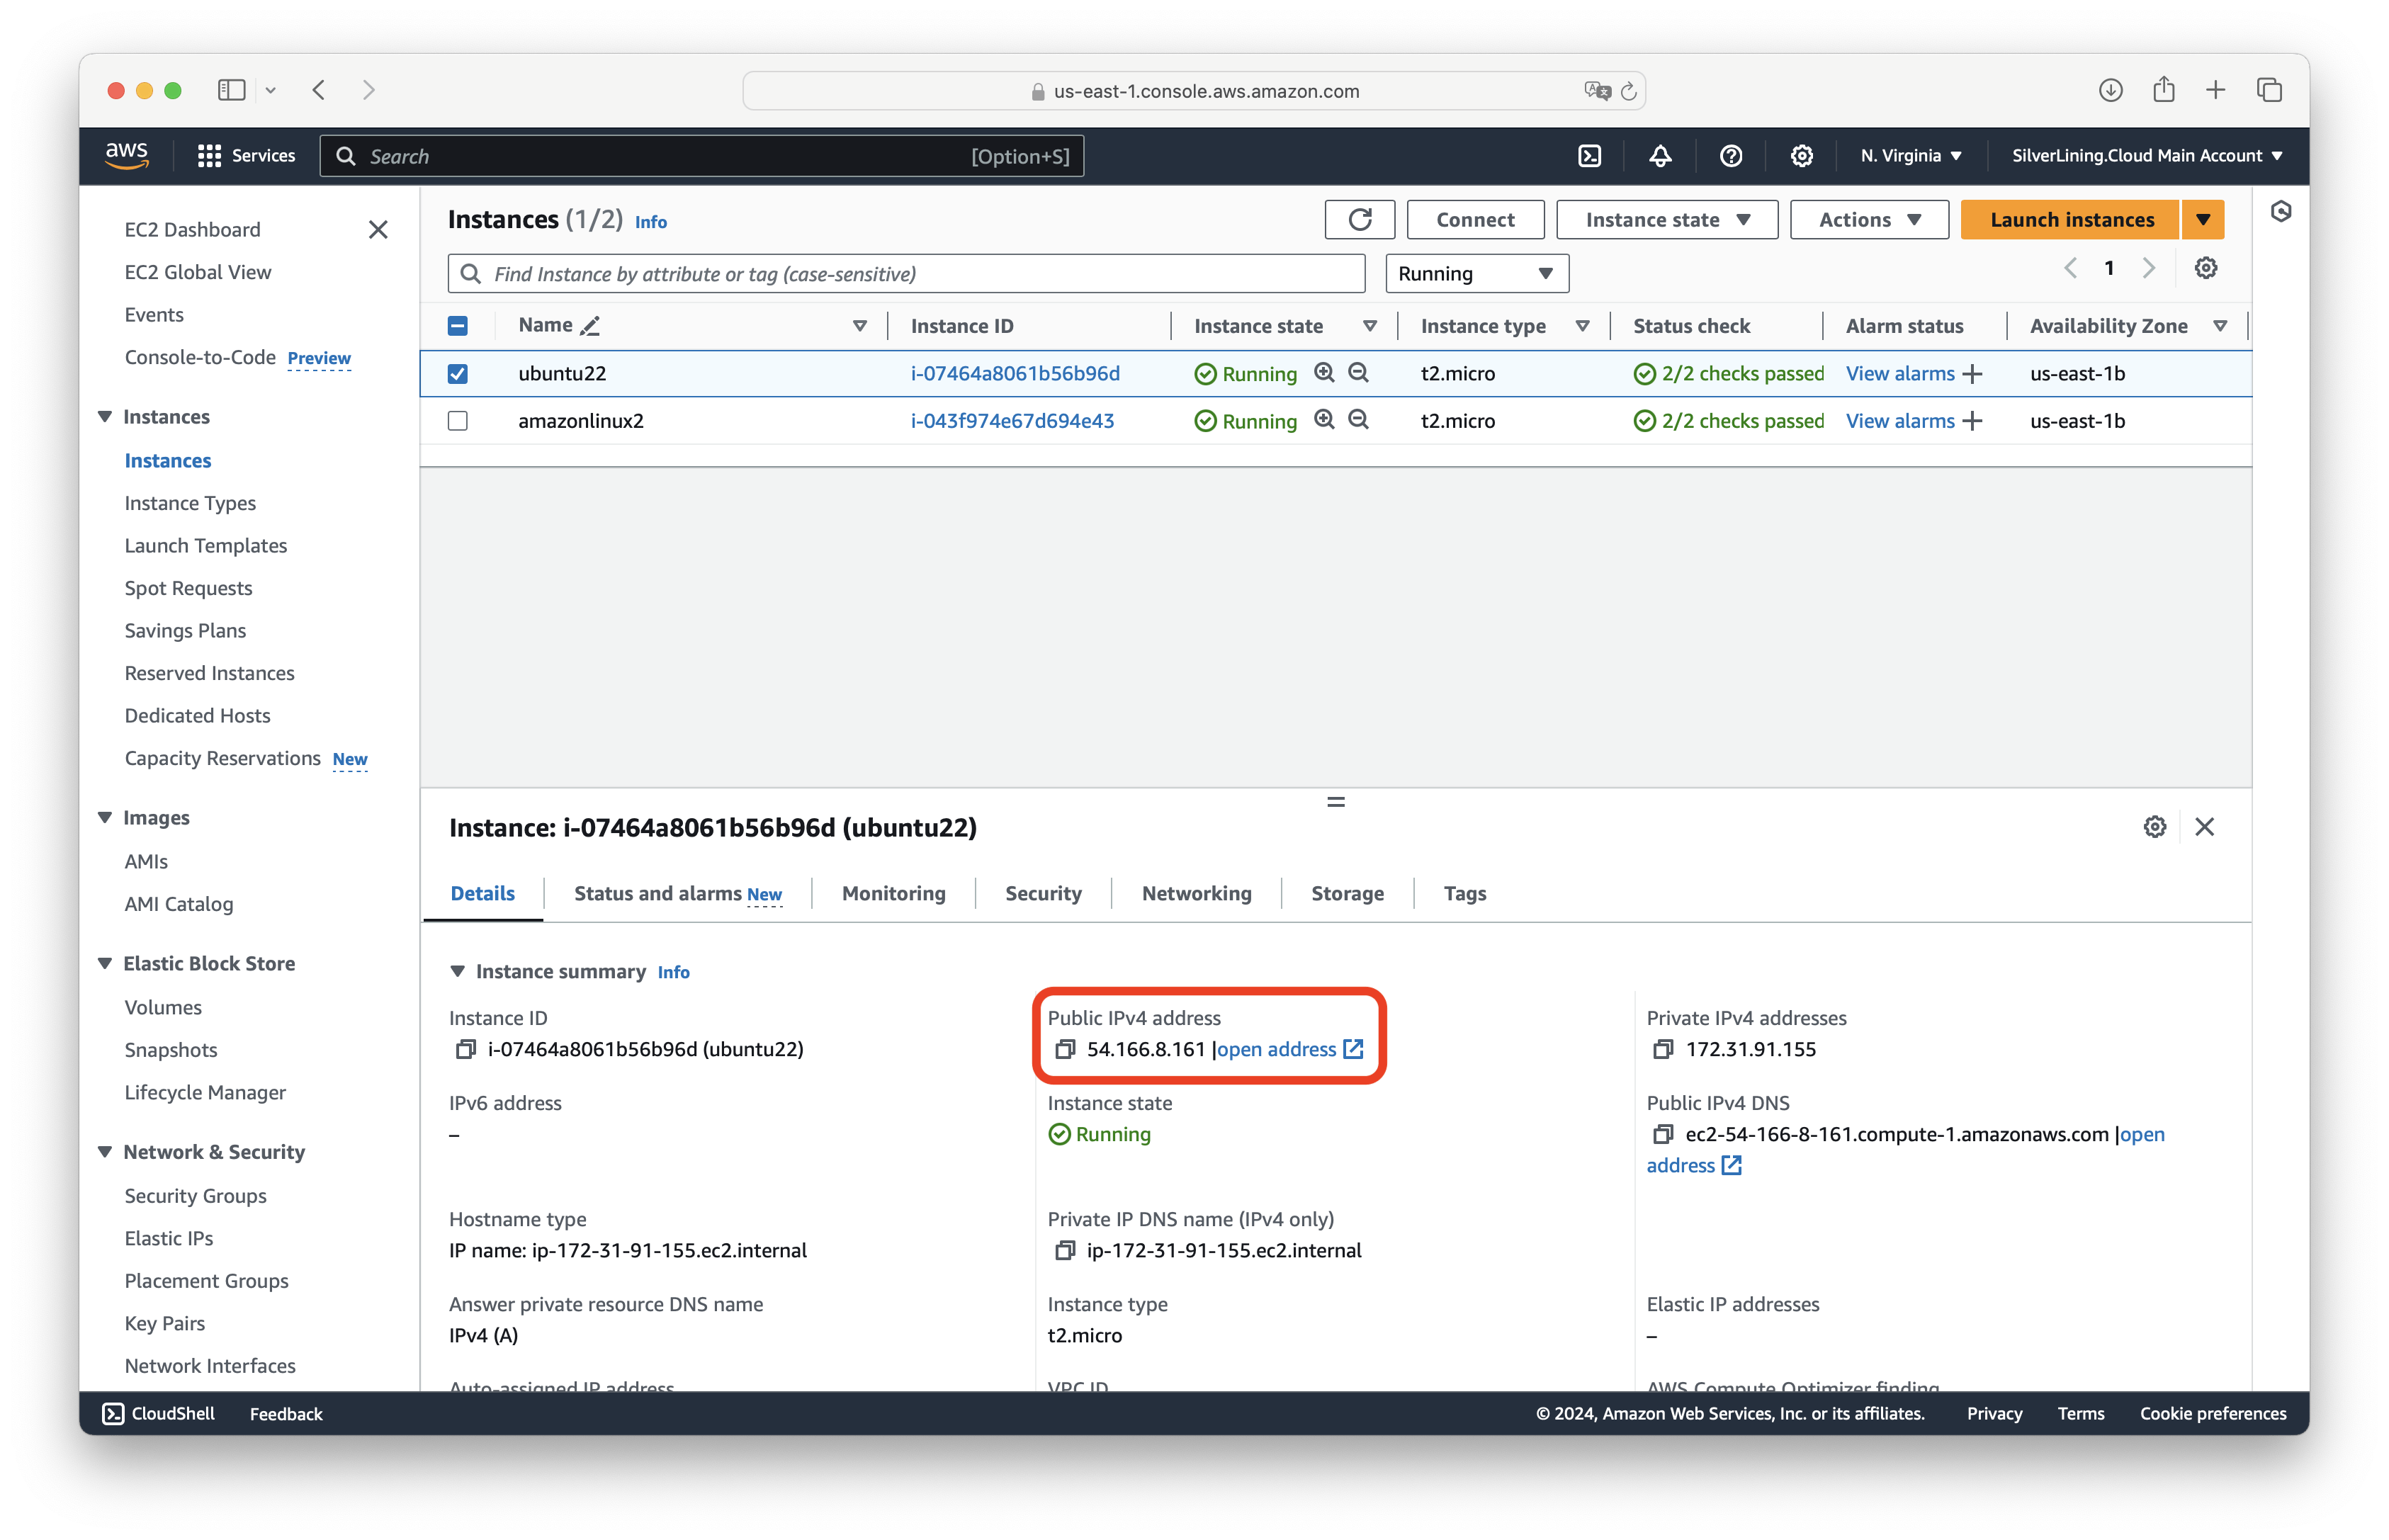
Go to the EC2 Management Console and select the virtual machine to obtain its Public IPv4 address.
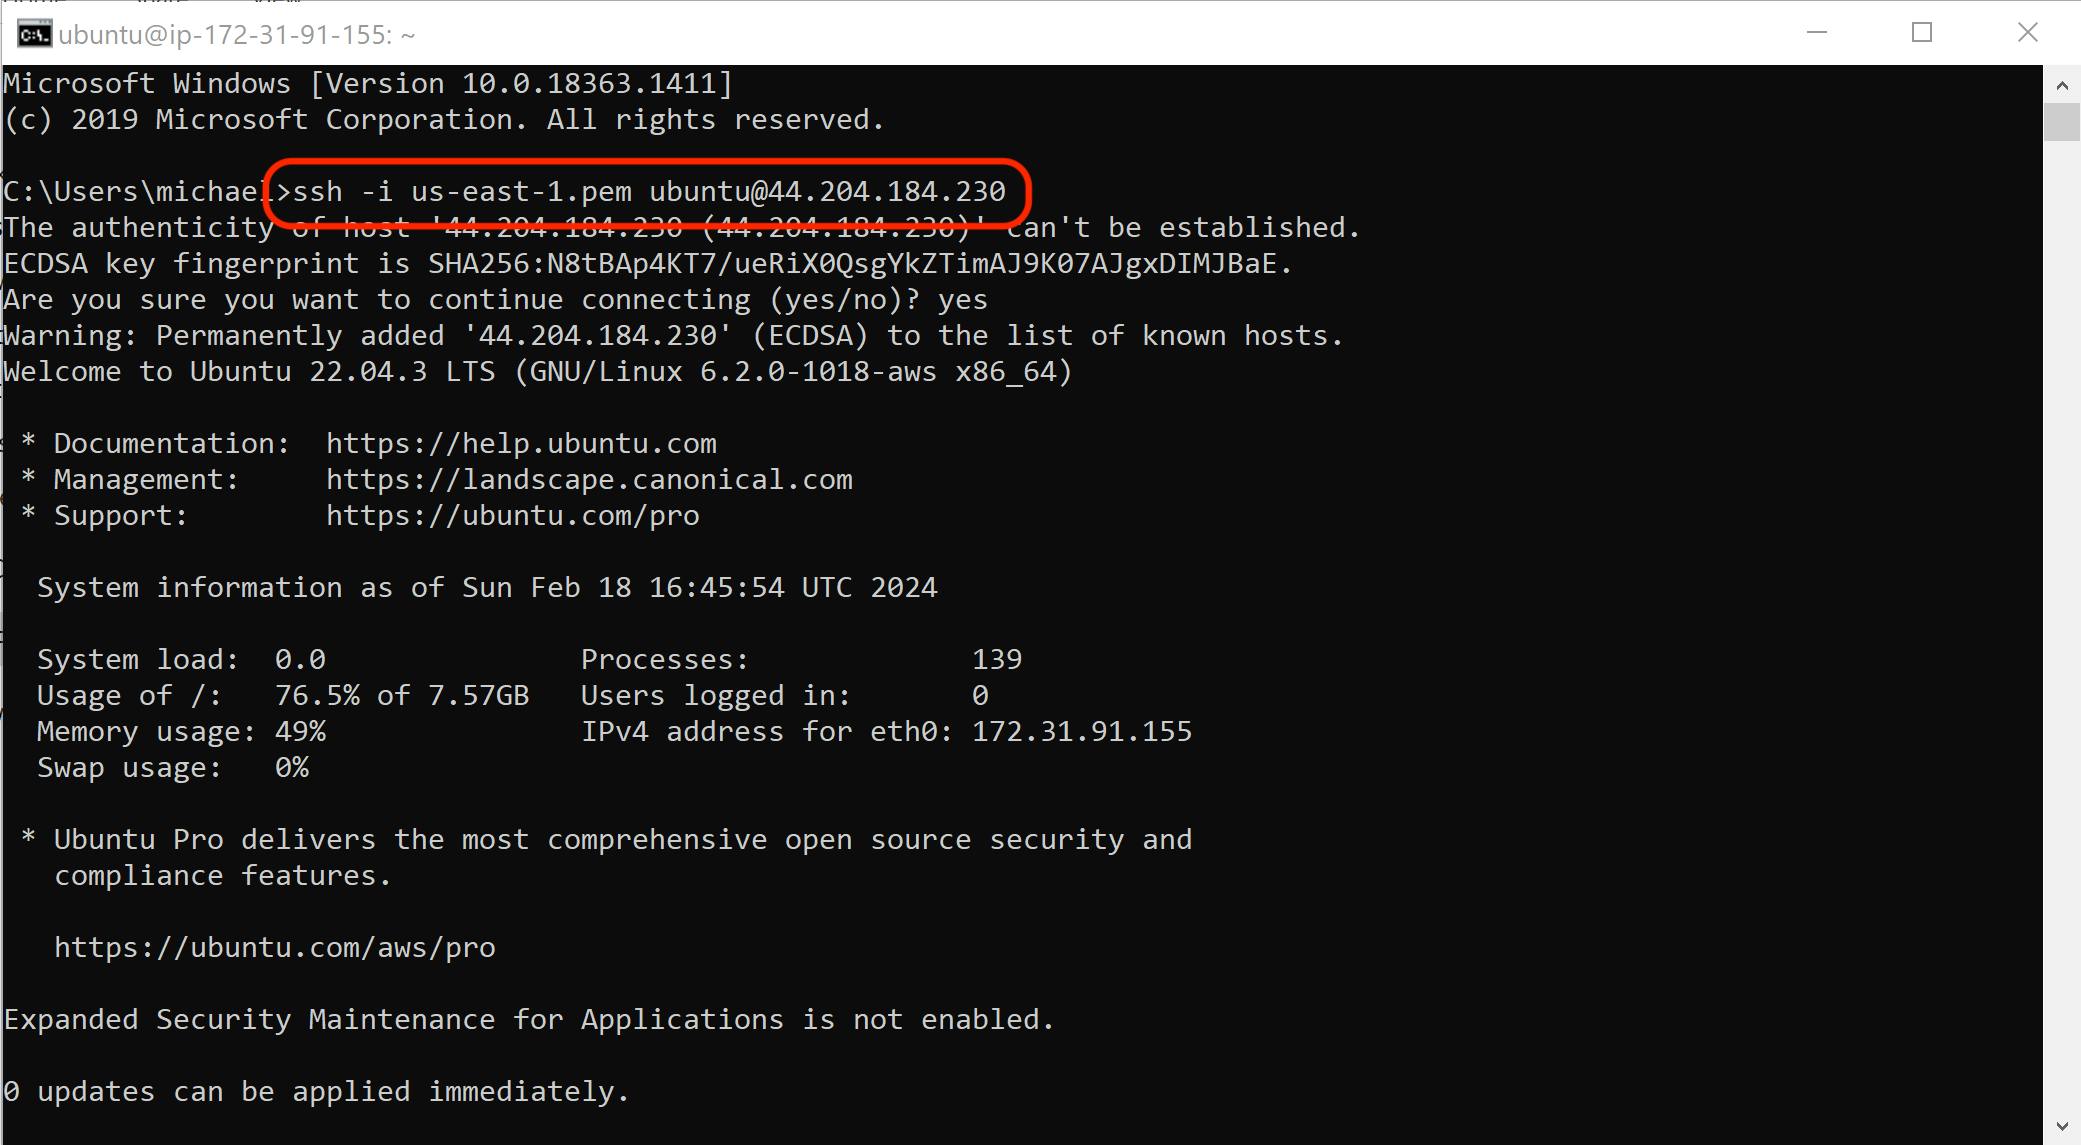
Open a Command Prompt / Terminal window and navigate to the directory where your created .pem key file is located. You can connect to your VM with the user 'ubuntu' by executing the following command:
ssh -i <name-of-key-file.pem> ubuntu@<public-ip>
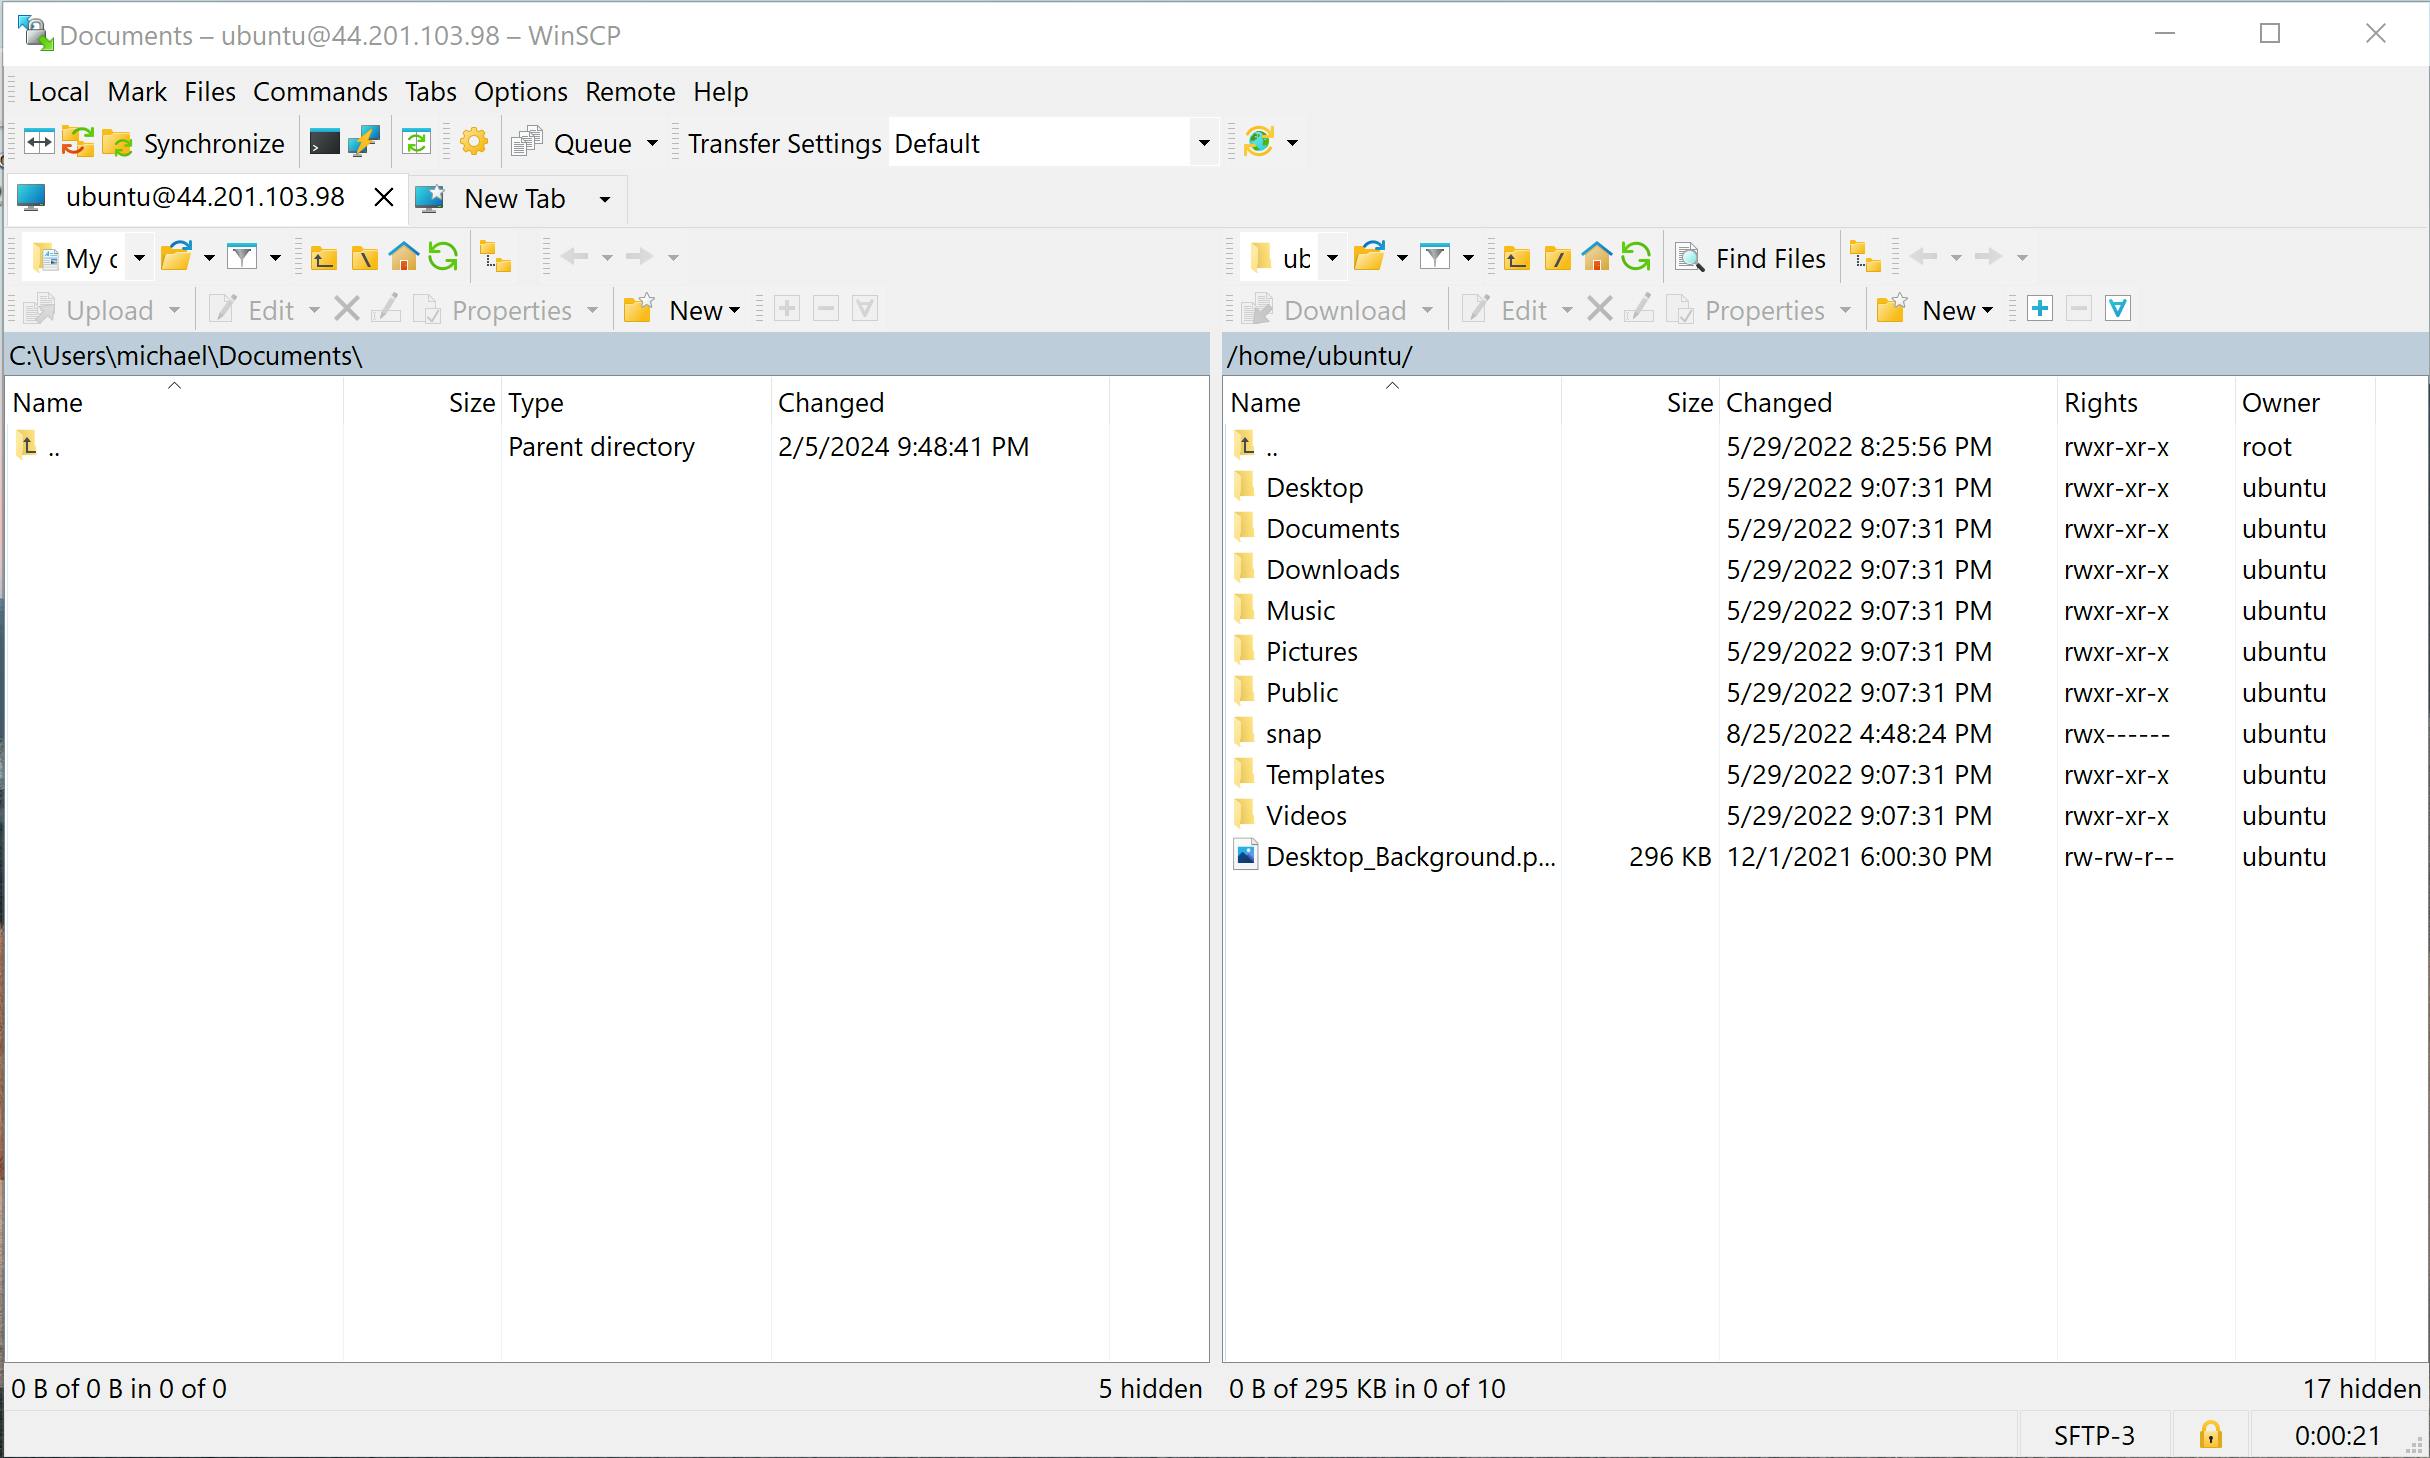
Deploy files on your VM remotely
Download and install WinSCP or any other SCP client of your choice.
Choose 'SFTP' as the file protocol and enter the public IP address of your instance, using 'ubuntu' as the username.

Click on 'Advanced'.
In the left-side menu, select 'Authentication'. Under Authentication parameters, select the key file you created when you launched the virtual machine. When prompted, convert the .pem key file to PuTTY format.
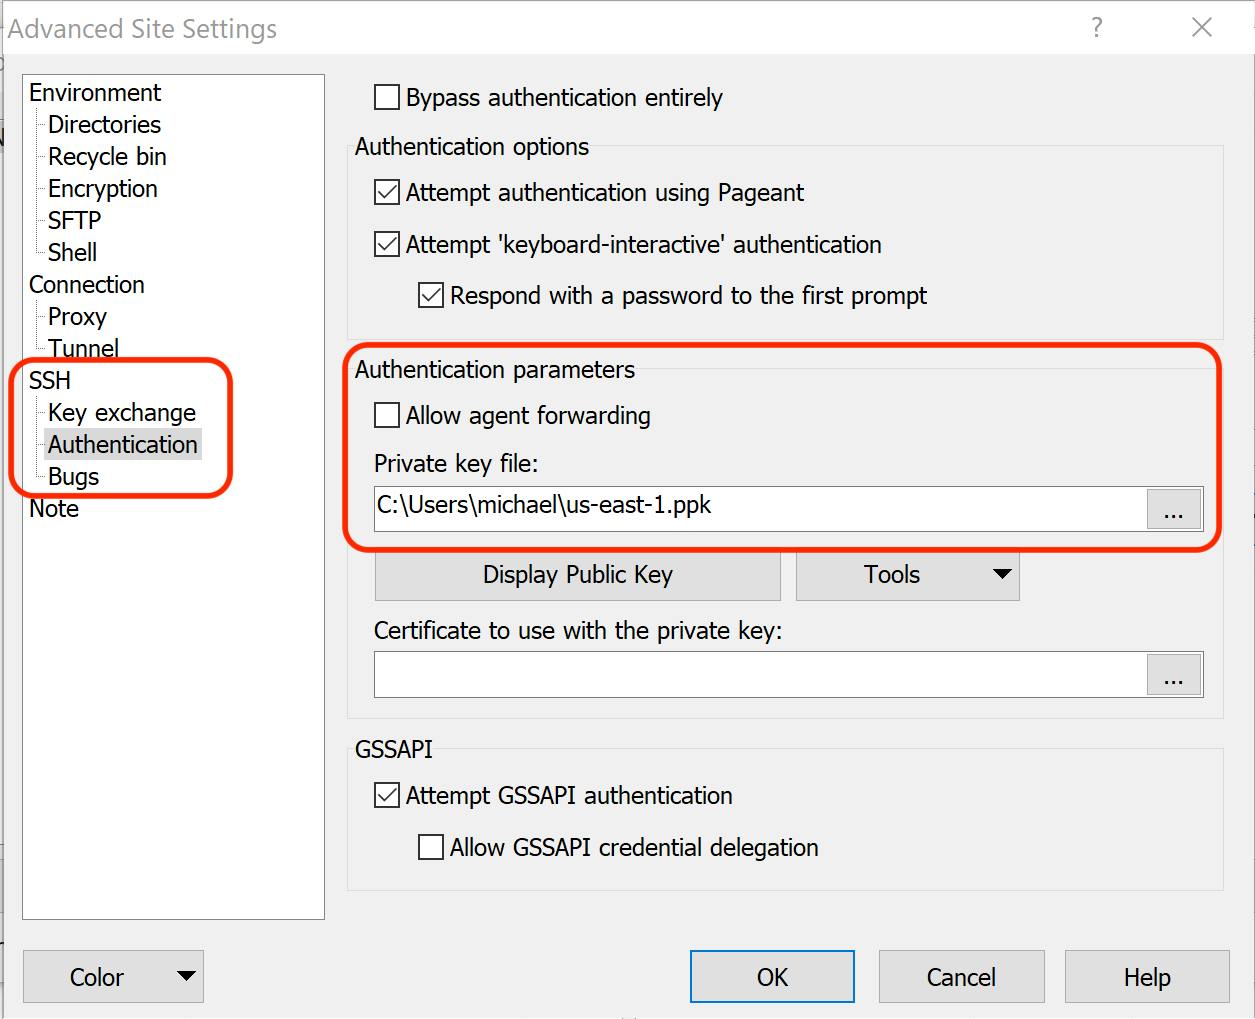
Close the Authentication window by clicking on 'OK', and connect to the virtual machine by clicking on 'Login'.
Configure GUI
The script that launches the GUI on every reboot is centrally located at /home/start-gui.sh. You can configure it with:
nano /home/start-gui.sh
The script is executed by a cron job as the root user. You can modify the cron job with:
sudo crontab -e
Change Password for the GUI Session:
To change the password for the GUI session, edit the start-gui.sh file and modify the password variable as desired. Ensure that your new password is at least 8 characters long. Passwords with fewer than 8 characters will fail. Then, reboot the instance. Please note that the password for the GUI session is different from the password for the Linux user.
Use Another User for the GUI Session:
To use a different user for the GUI session, create a new user with:
sudo adduser guiuser
Then, add the user to the sudo group with:
sudo usermod -aG sudo guiuser
Next, edit the start-gui.sh file, change the username variable, and reboot the instance.
Troubleshooting
Resolving RDP/VNC Connection Issues
Potential solutions to resolve your connection issues are:
- Ensure that you are using the correct login credentials. As outlined in our "Connect to GUI (RDP and VNC)" section above, the default username is "ubuntu" and the default password is your dedicated EC2 instance ID (which looks similar to "i-aaaabbbbccccdddd").
- The GUI is designed to reconfigure and restart with every instance reboot. Please try restarting your instance to resolve any connection issues. If the connection issues persist and are not resolved by a reboot, you may need to consider deploying a new virtual machine.
- Verify that your local network is not blocking access to ports 3389 (RDP) or 5901 (VNC). Corporate networks, in particular, tend to block these ports. Ensure that your internal network is not blocking these ports before attempting to connect to the instance GUI.
How to Utilize the Clipboard for Copy & Paste Operations
You may experience issues with copying and pasting to and from the virtual machine. Ensure that your local RDP and VNC clients support clipboard sharing. If the keyboard shortcuts for copy and paste do not work, try using right-click to copy or right-click to paste.
Ubuntu 22.04 only: There is a known issue that prevents pasting from the local clipboard to the remote machine. If this affects you, please consider using our Ubuntu 20.04 or 24.04 with GUI options.
Installed Applications Not Shown
Sometimes, applications installed via Ubuntu's Snap package manager do not appear in the application list. To resolve this, execute the following command:
sudo cp /var/lib/snapd/desktop/applications/*.desktop /usr/share/applications/
The GUI Desktop Freezes
If your desktop environment gets stuck or freezes, ensure that your instance has sufficient memory. We recommend using an EC2 instance type with at least 4 GB of memory. Additionally, check if you are running low on available disk space, as this could also cause the GUI to freeze.
RDP Only Shows a Login Page
If you see the login page below, it means RDP couldn’t connect to the GUI. This can happen if the password is incorrect or there’s an issue with the GUI. Double-check that you’re entering the correct password, and if the problem continues, try rebooting the system.
Note: The keyboard layout on this login page is set to English. Special characters may appear differently because of your physical keyboard's layout. Since the password is the instance ID of your EC2 instance, keep in mind that the hyphen ("-") in the instance ID (e.g., "i-0abc...") may be in a different location on an English keyboard - it’s usually next to the "0" (zero) key on the right. We recommend setting the password directly in the RDP client (see the "Connect to GUI" section).

How can I cancel my subscription?
To cancel your subscription, follow these steps:
- Go to the AWS Marketplace Console at https://aws.amazon.com/marketplace/library. Ensure that you are logged into the account that is subscribed to the product you want to cancel.
- Find the product you want to cancel and click on 'Manage.'
- Click on 'Actions' and then select 'Cancel subscription.'
For more detailed instructions, visit the AWS Marketplace Buyer Guide at https://docs.aws.amazon.com/marketplace/latest/buyerguide/cancel-subscription.html.