S3ndless File Sharing
Table of Content
Subscribe on AWS Marketplace
Deploy S3ndless File Sharing
Use your own (Sub-)Domain
File Sharing Workflow
Customize your Experience
API Usage
Troubleshooting
Subscribe on AWS Marketplace
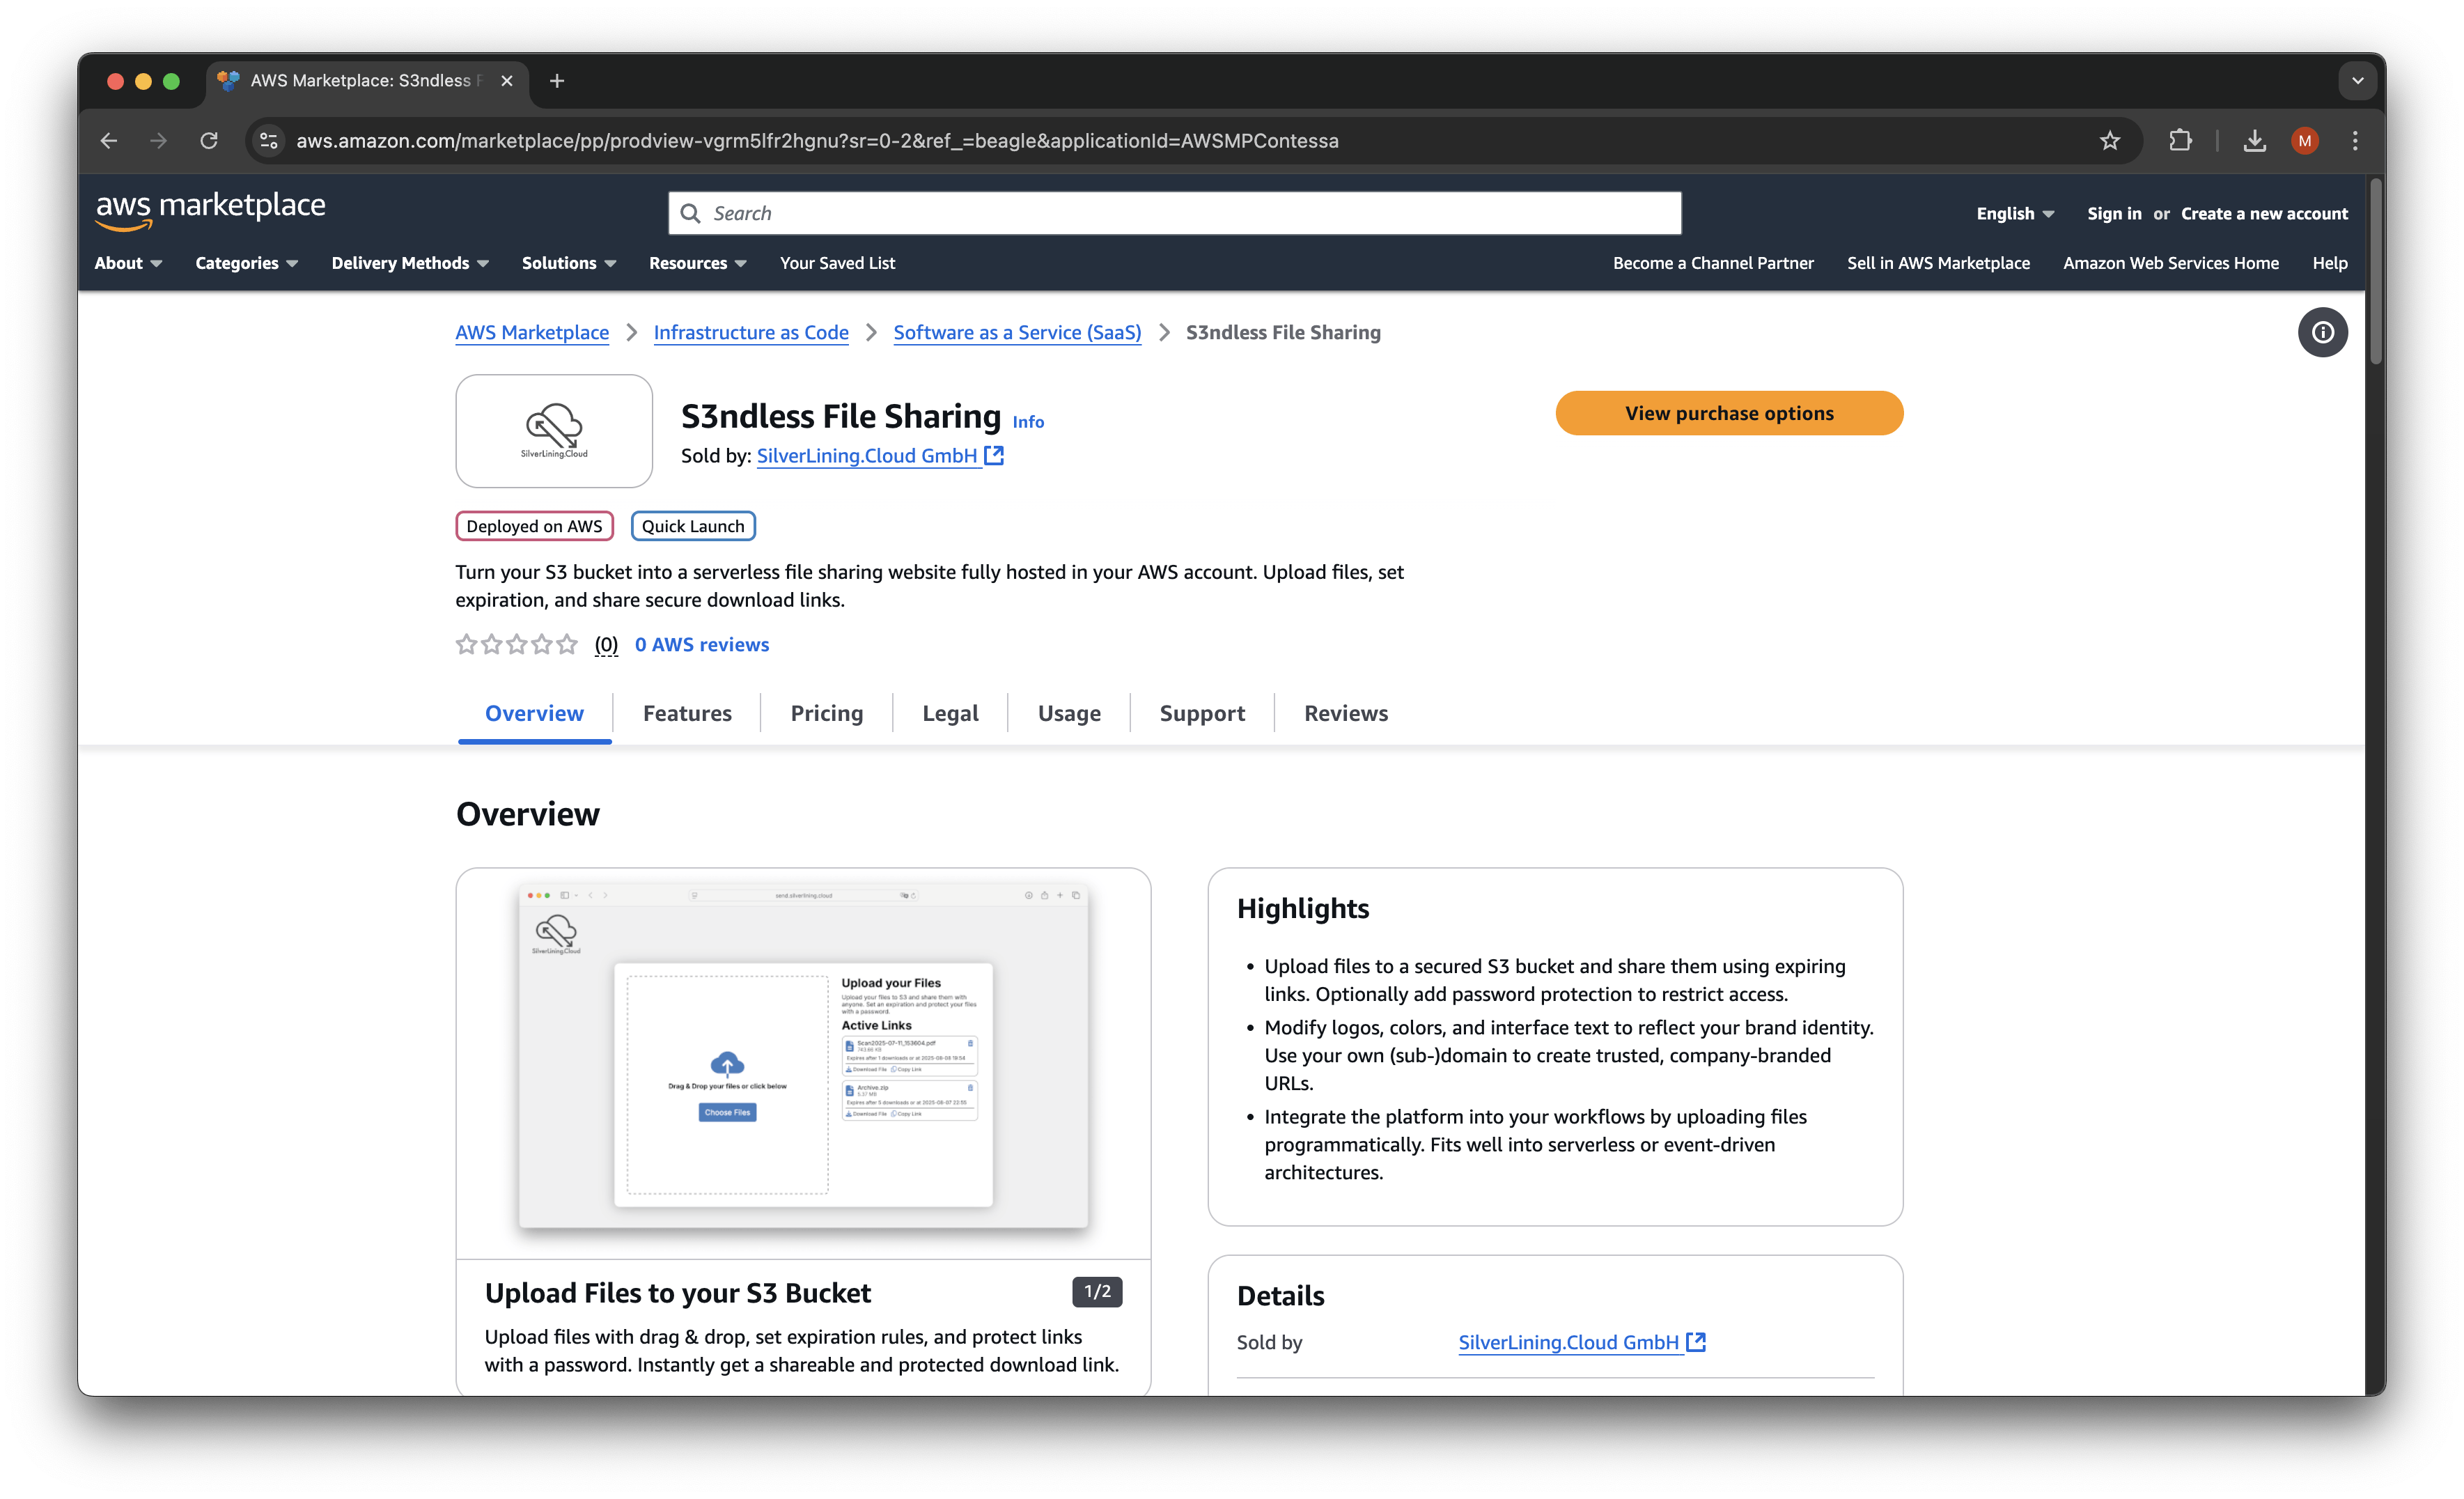
Navigate to our product listing on the AWS Marketplace. Select the "View purchase options" button to proceed.
On the following page, select "Deployment" as the contract option.

Next, click "Create contract" and then "Pay now".

To begin the deployment process, click on "Set up your account."

Please create an account on our website by clicking "Log in or create an account." This allows us to identify you and ensure you receive the necessary support.

On the next page, enter your name and email address, then click "Subscribe." You are now ready to deploy your application.

Deploy the S3ndless CloudFormation Stack
Ensure you have followed the steps above to subscribe to the AWS Marketplace listing and confirm that you have the required AWS permissions to deploy the CloudFormation stack.
To start the deployment, click on "Launch template."

Select the region you would like to deploy the stack, then click on "Launch template."


The CloudFormation stack is now deploying. Due to the deployment of a CloudFront distribution, this process can take up to 30 minutes to complete. Wait until the stack status changes to "CREATE_COMPLETE."

Once the stack has been successfully created, your personal S3ndless website will be available at the URL of the created CloudFront distribution. To obtain this URL, open the CloudFront console at https://us-east-1.console.aws.amazon.com/cloudfront/v4/home?region=us-east-1#/distributions.

You can now access the S3ndless website using this URL. Please refer to the chapter below for instructions on how to configure your own domain.
On the CloudFormation page, choose a name for your stack and acknowledge that AWS CloudFormation will create IAM resources. Then, click on "Create stack."
Use your own Domain
After deploying the CloudFormation stack (see the chapter above), the S3ndless app will be available at a default CloudFront URL. Below, you will find steps to configure it for use with your own root domain (e.g., example.com) or a subdomain (e.g., send.example.com). The following instructions cover how to add an SSL certificate to enable HTTPS and how to redirect traffic from the (sub)domain to the S3ndless app.
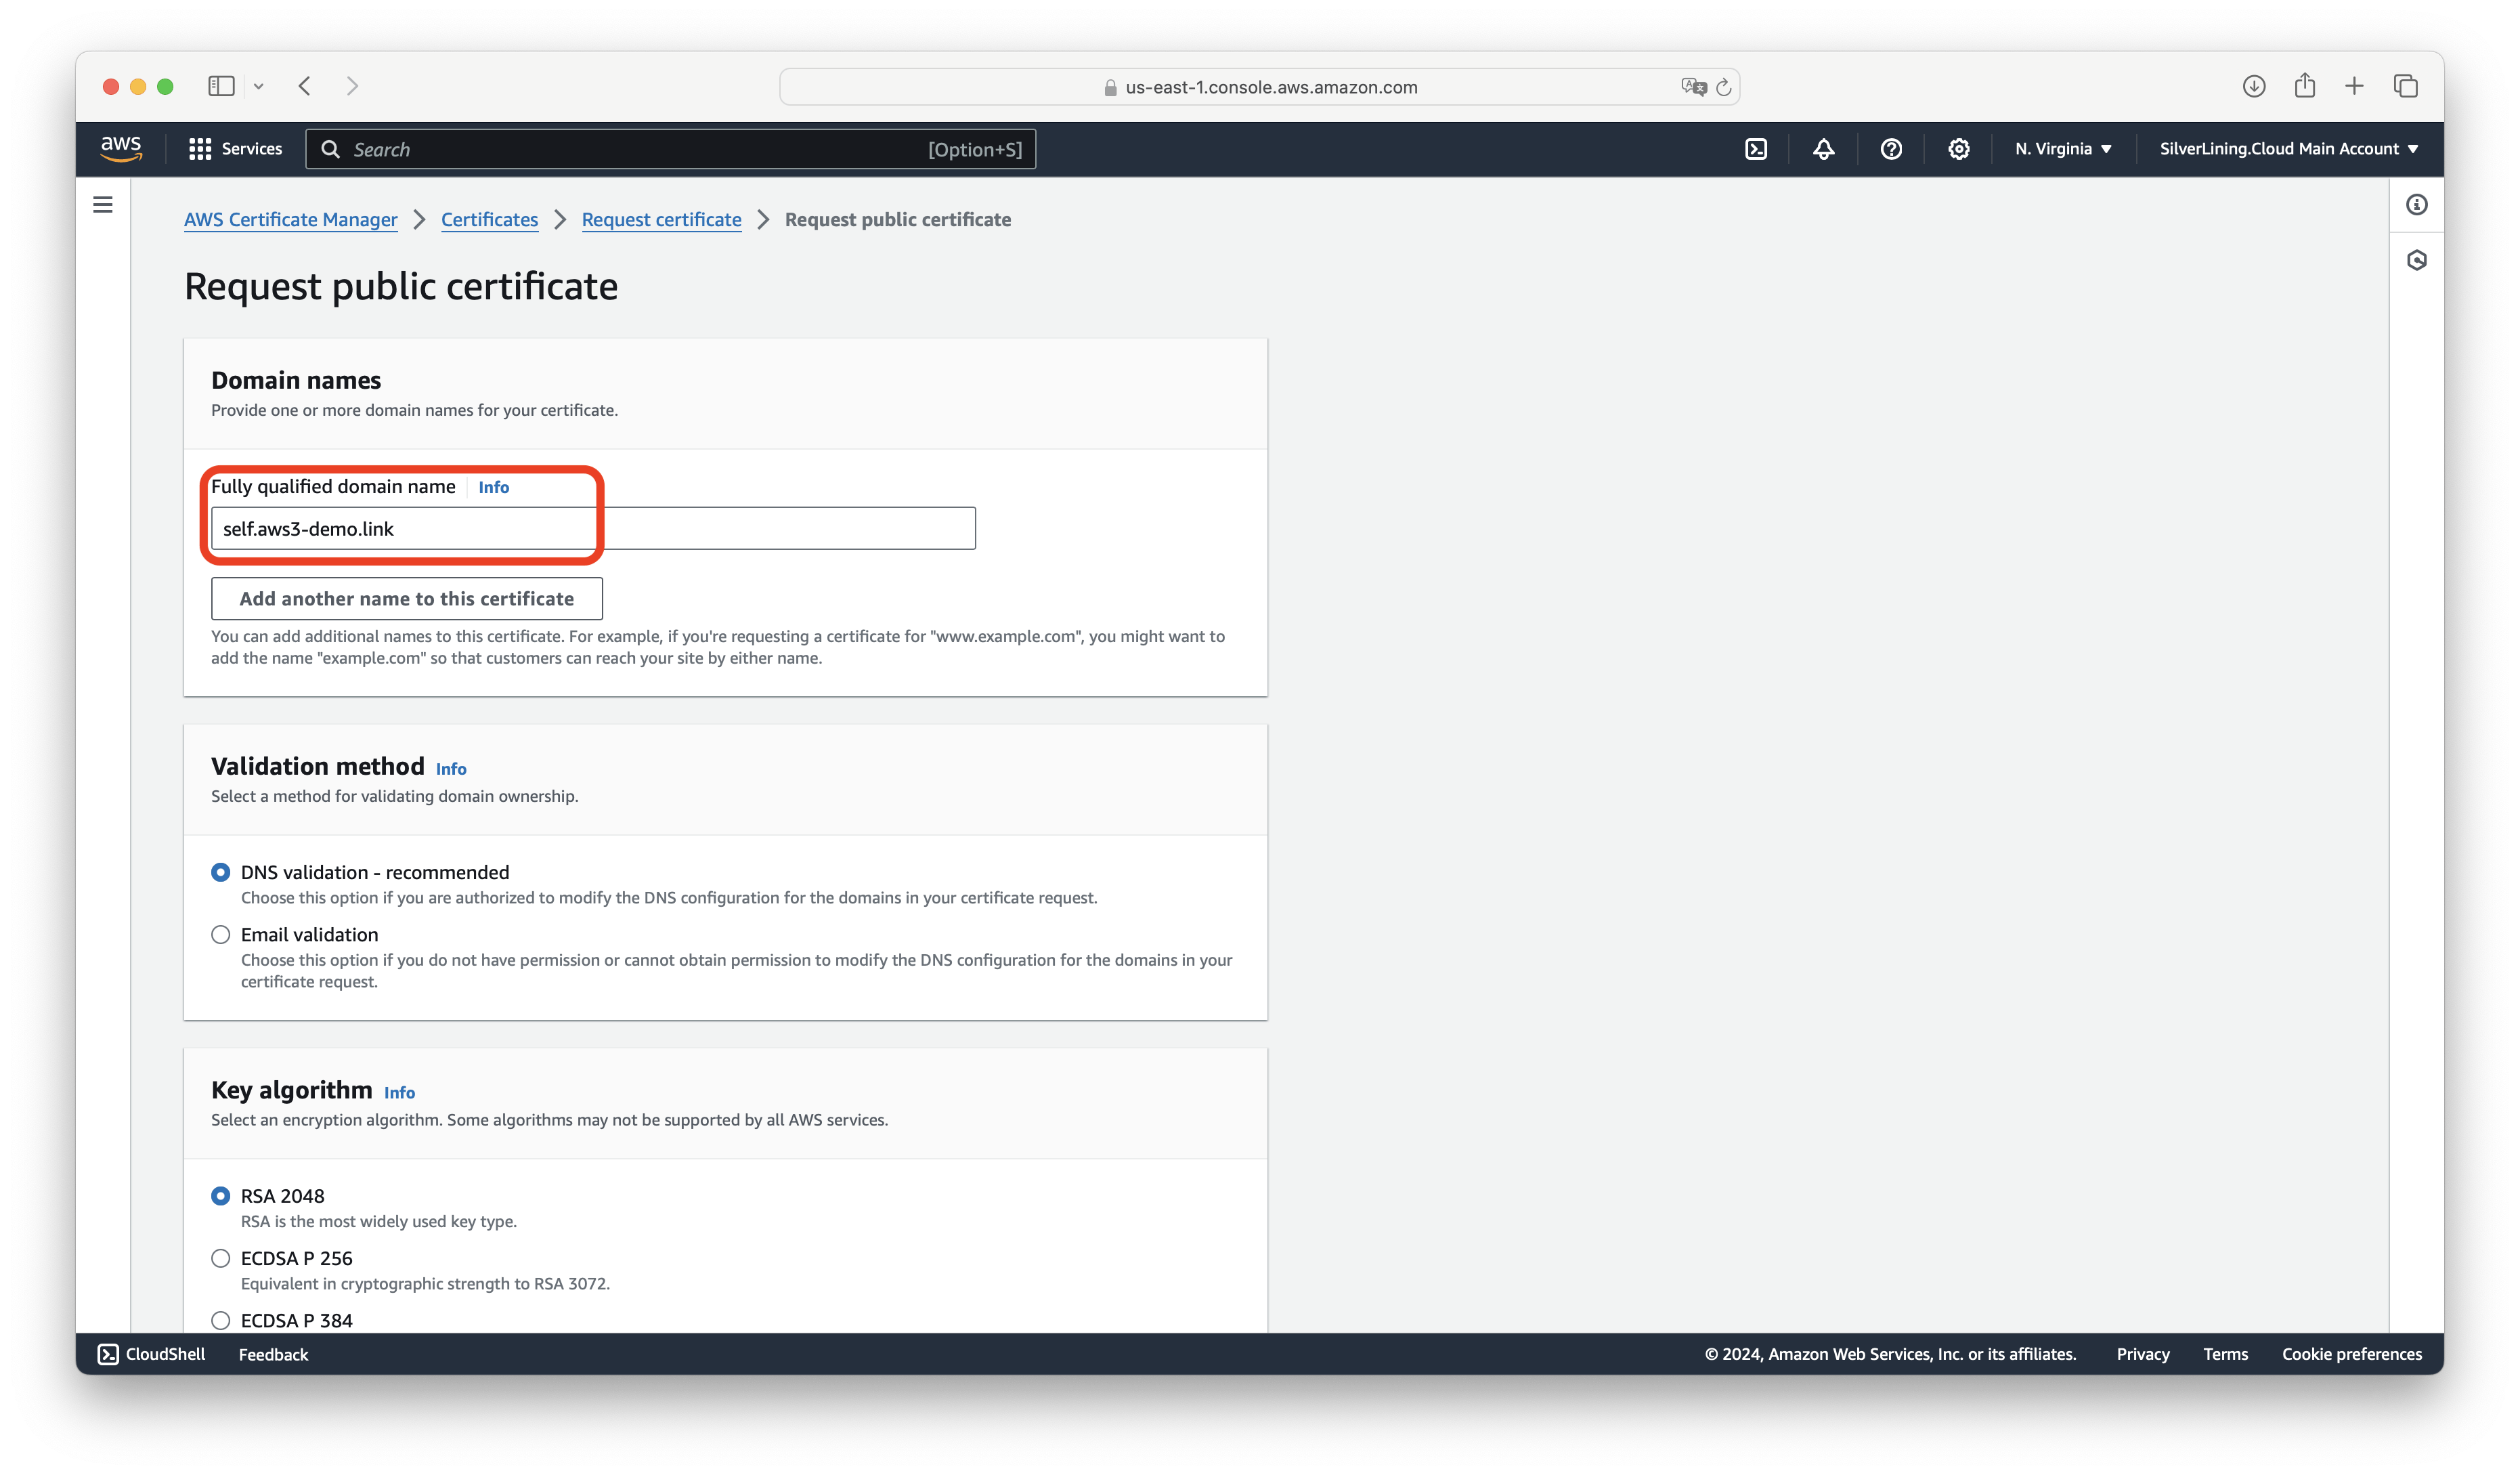
If you do not have an SSL certificate for the subdomain you would like to use with S3ndless, you need to request one at AWS Certificate Manager at https://us-east-1.console.aws.amazon.com/acm/home?region=us-east-1#/certificates/request. In this tutorial, we are using the domain "self.aws3-demo.link"; you should use your own subdomain. On the Request Certificate page, click on Next.

Enter your subdomain, then click on Request.
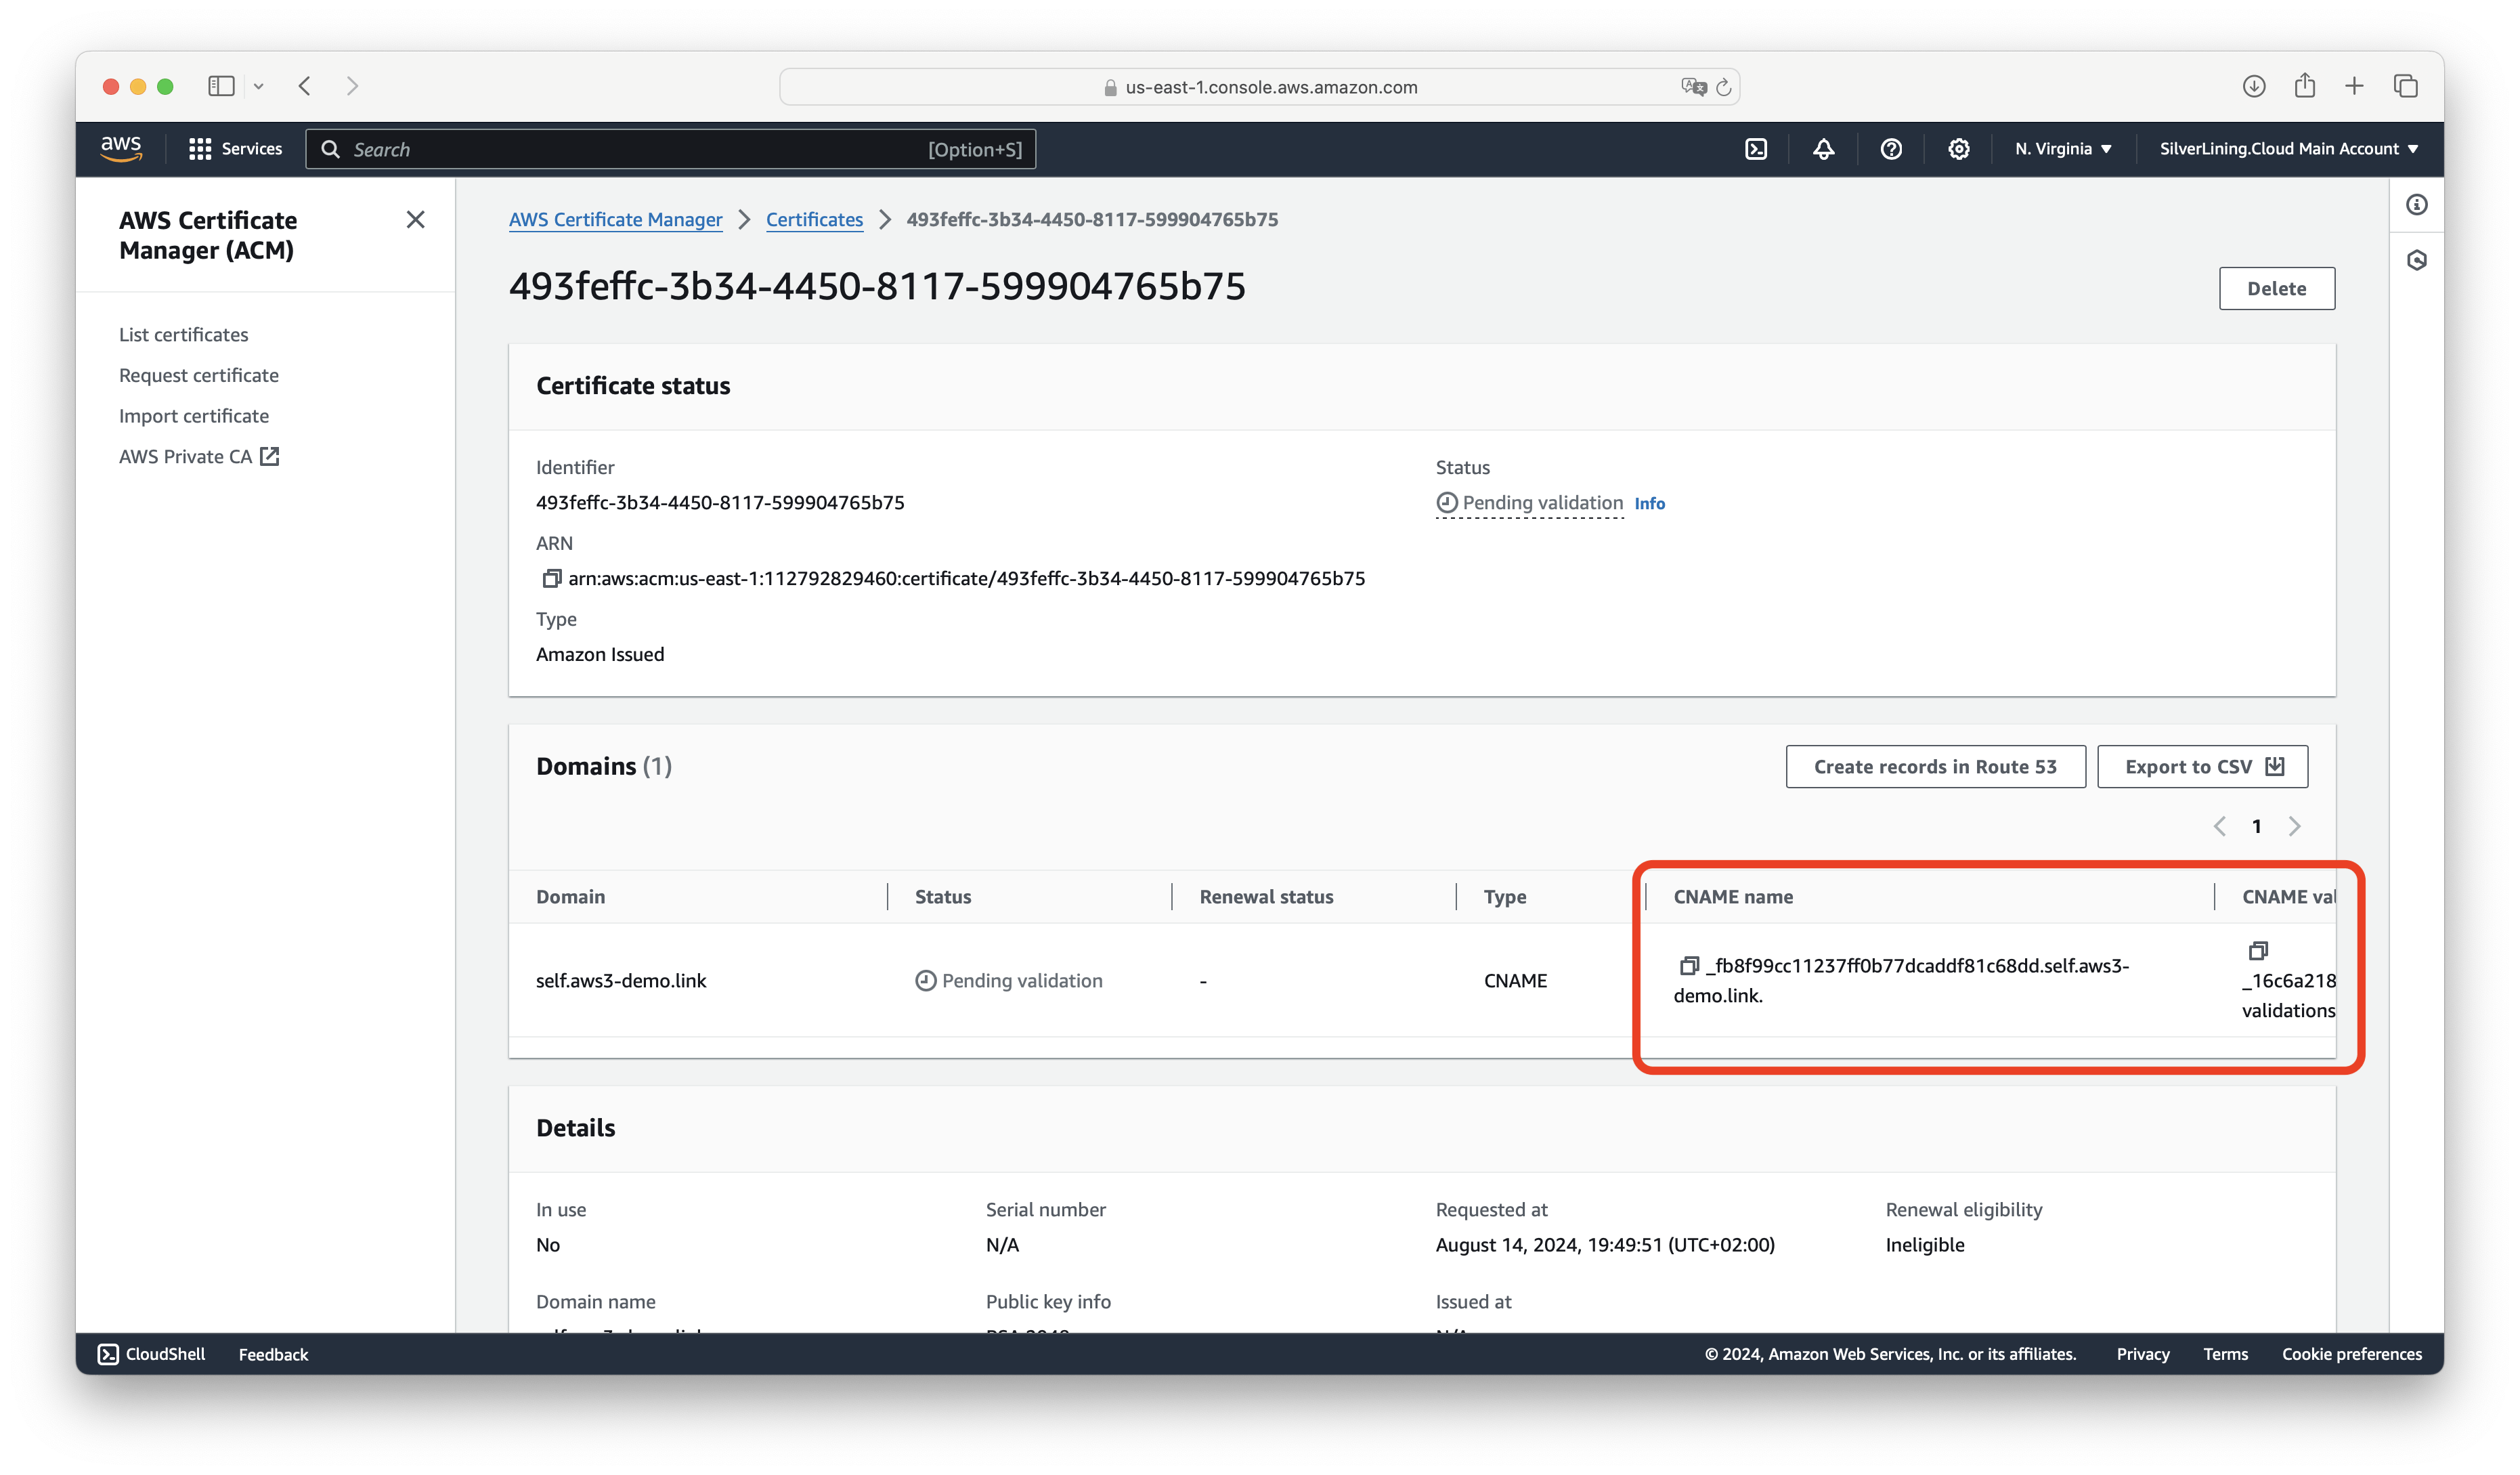
Open your newly created certificate and note the CNAME names and values. If you are using AWS Route 53 for domain management, you can use the Create records in Route 53 feature; otherwise, you will need to manually add these records to your domain.
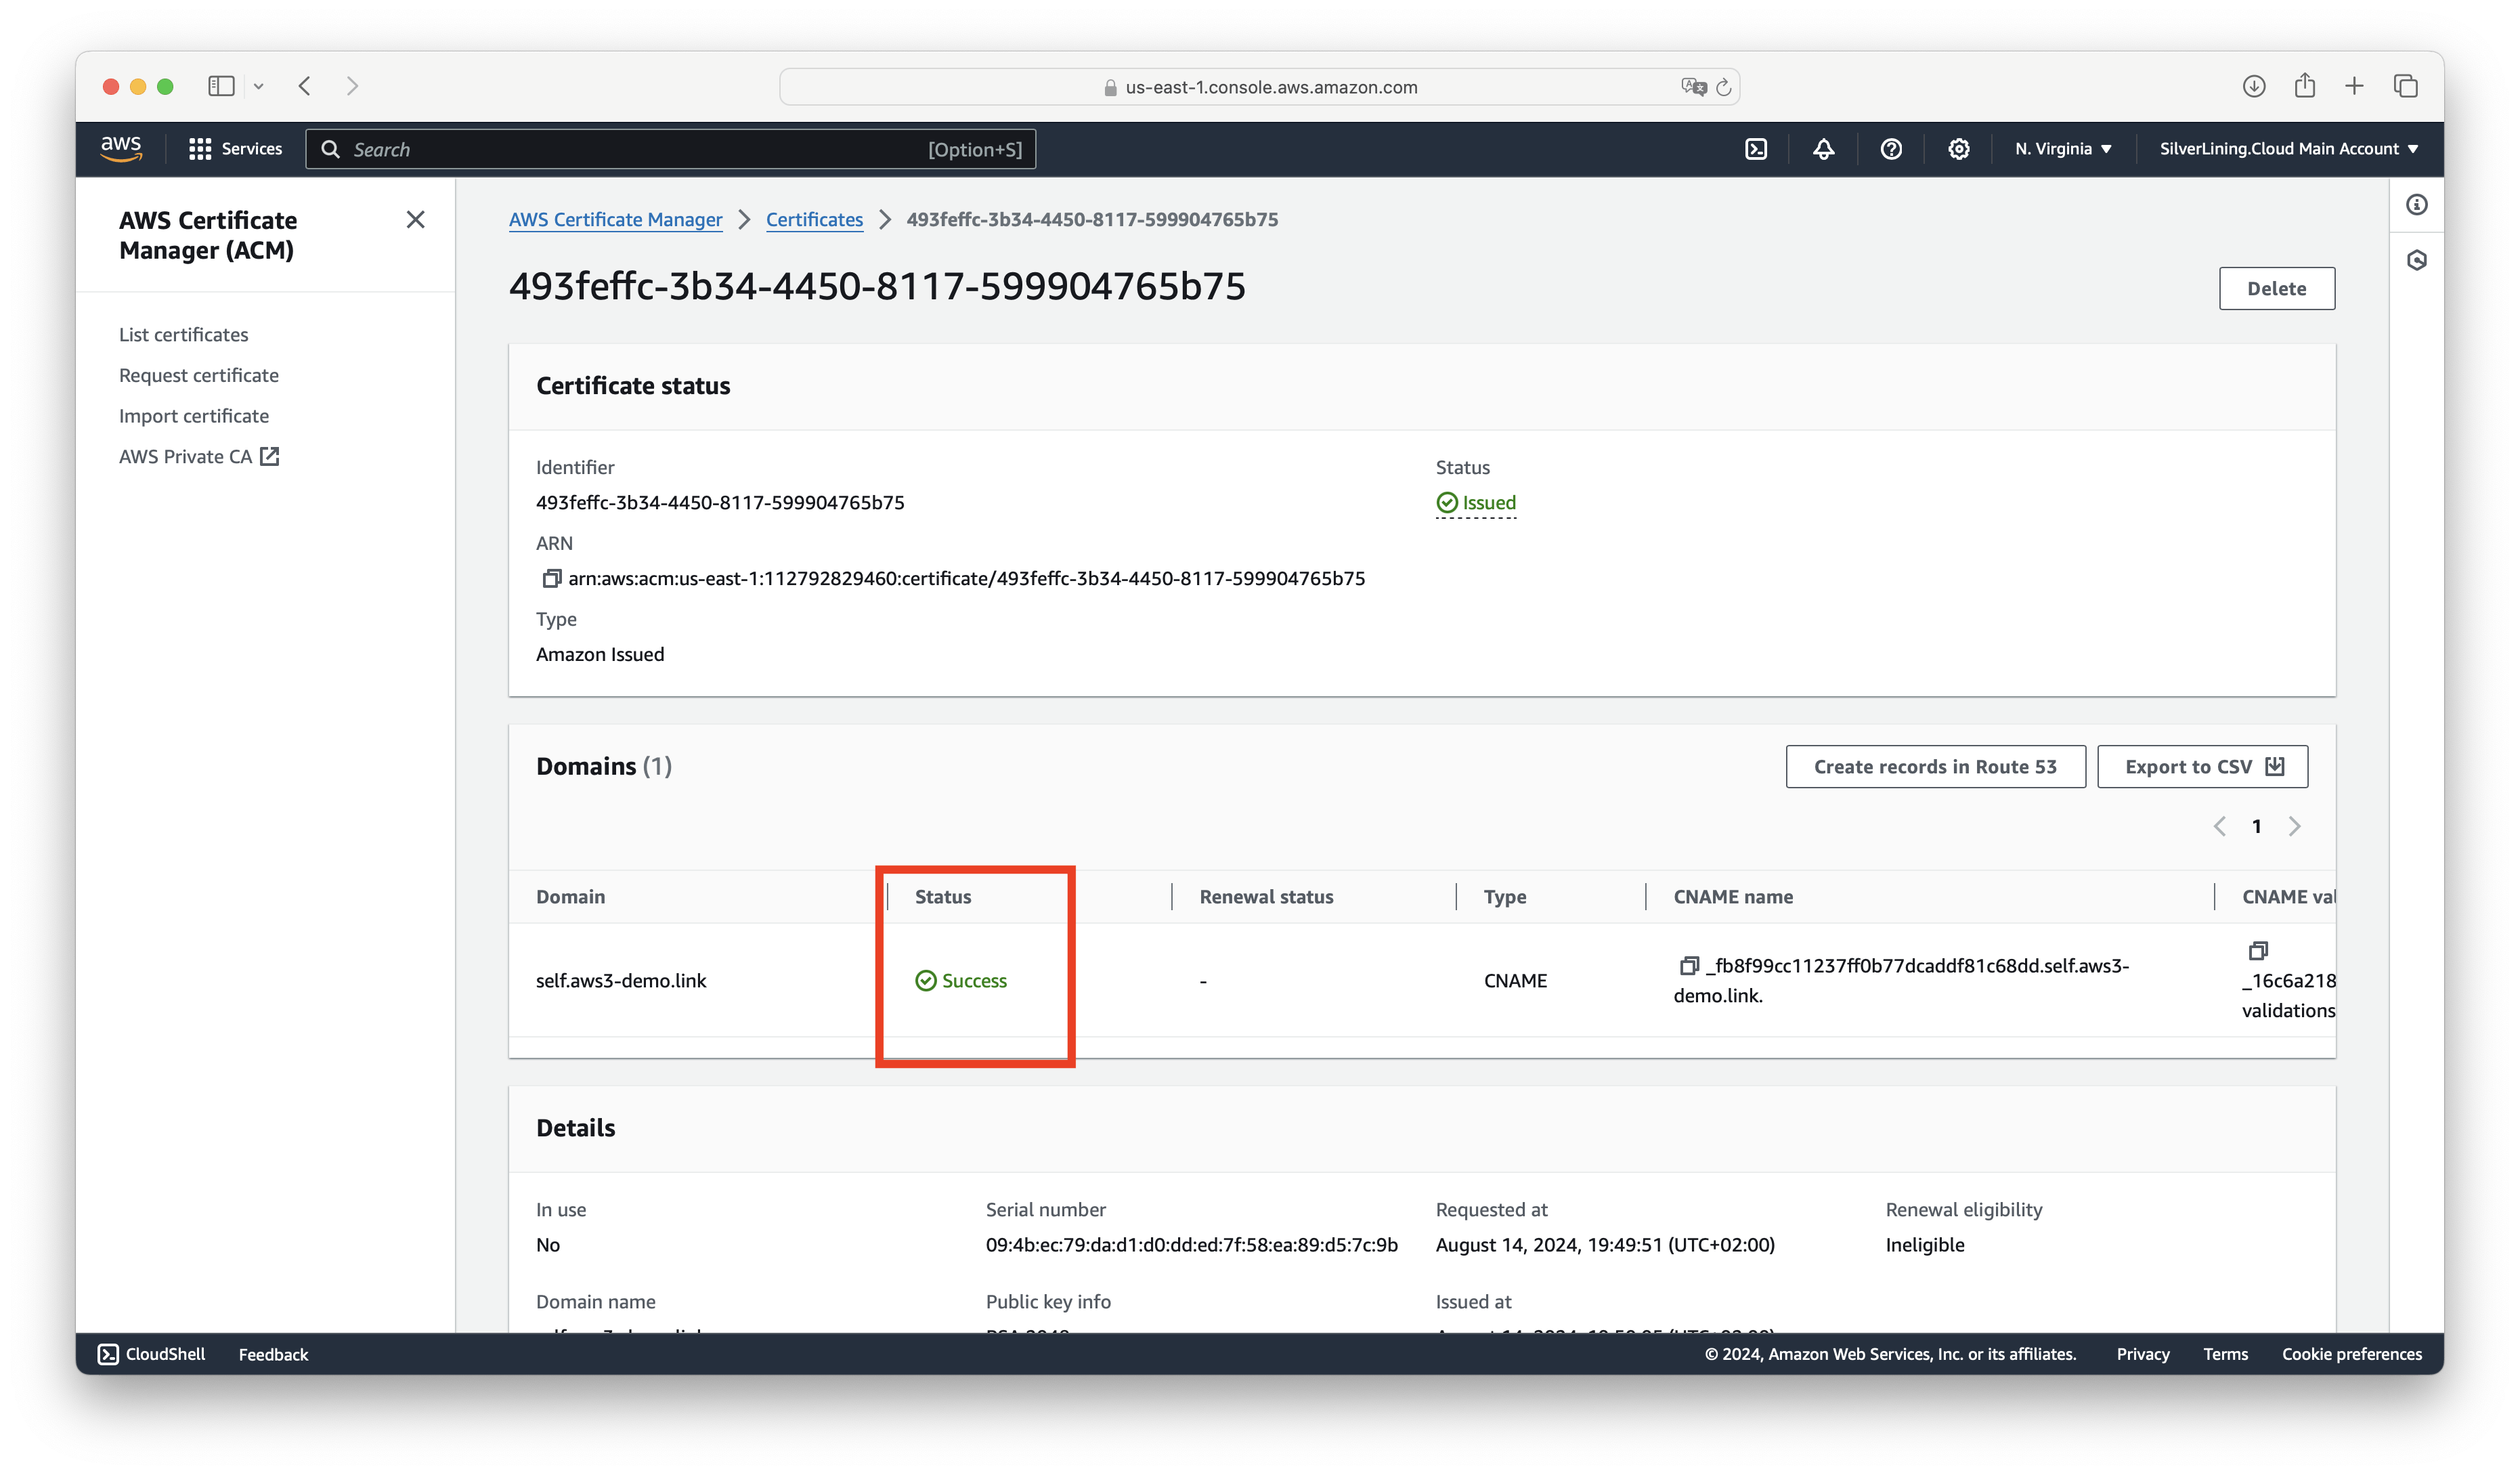
Once the records are validated, the status will change to Success.
Connect the certificate to the S3ndless CloudFront distribution by going to CloudFront Distributions at https://us-east-1.console.aws.amazon.com/cloudfront/v4/home?region=us-east-1#/distributions and selecting the distribution.

In the Settings tab, click on Edit.

Under Alternate domain name, enter your subdomain. Select the created SSL certificate and save the changes.
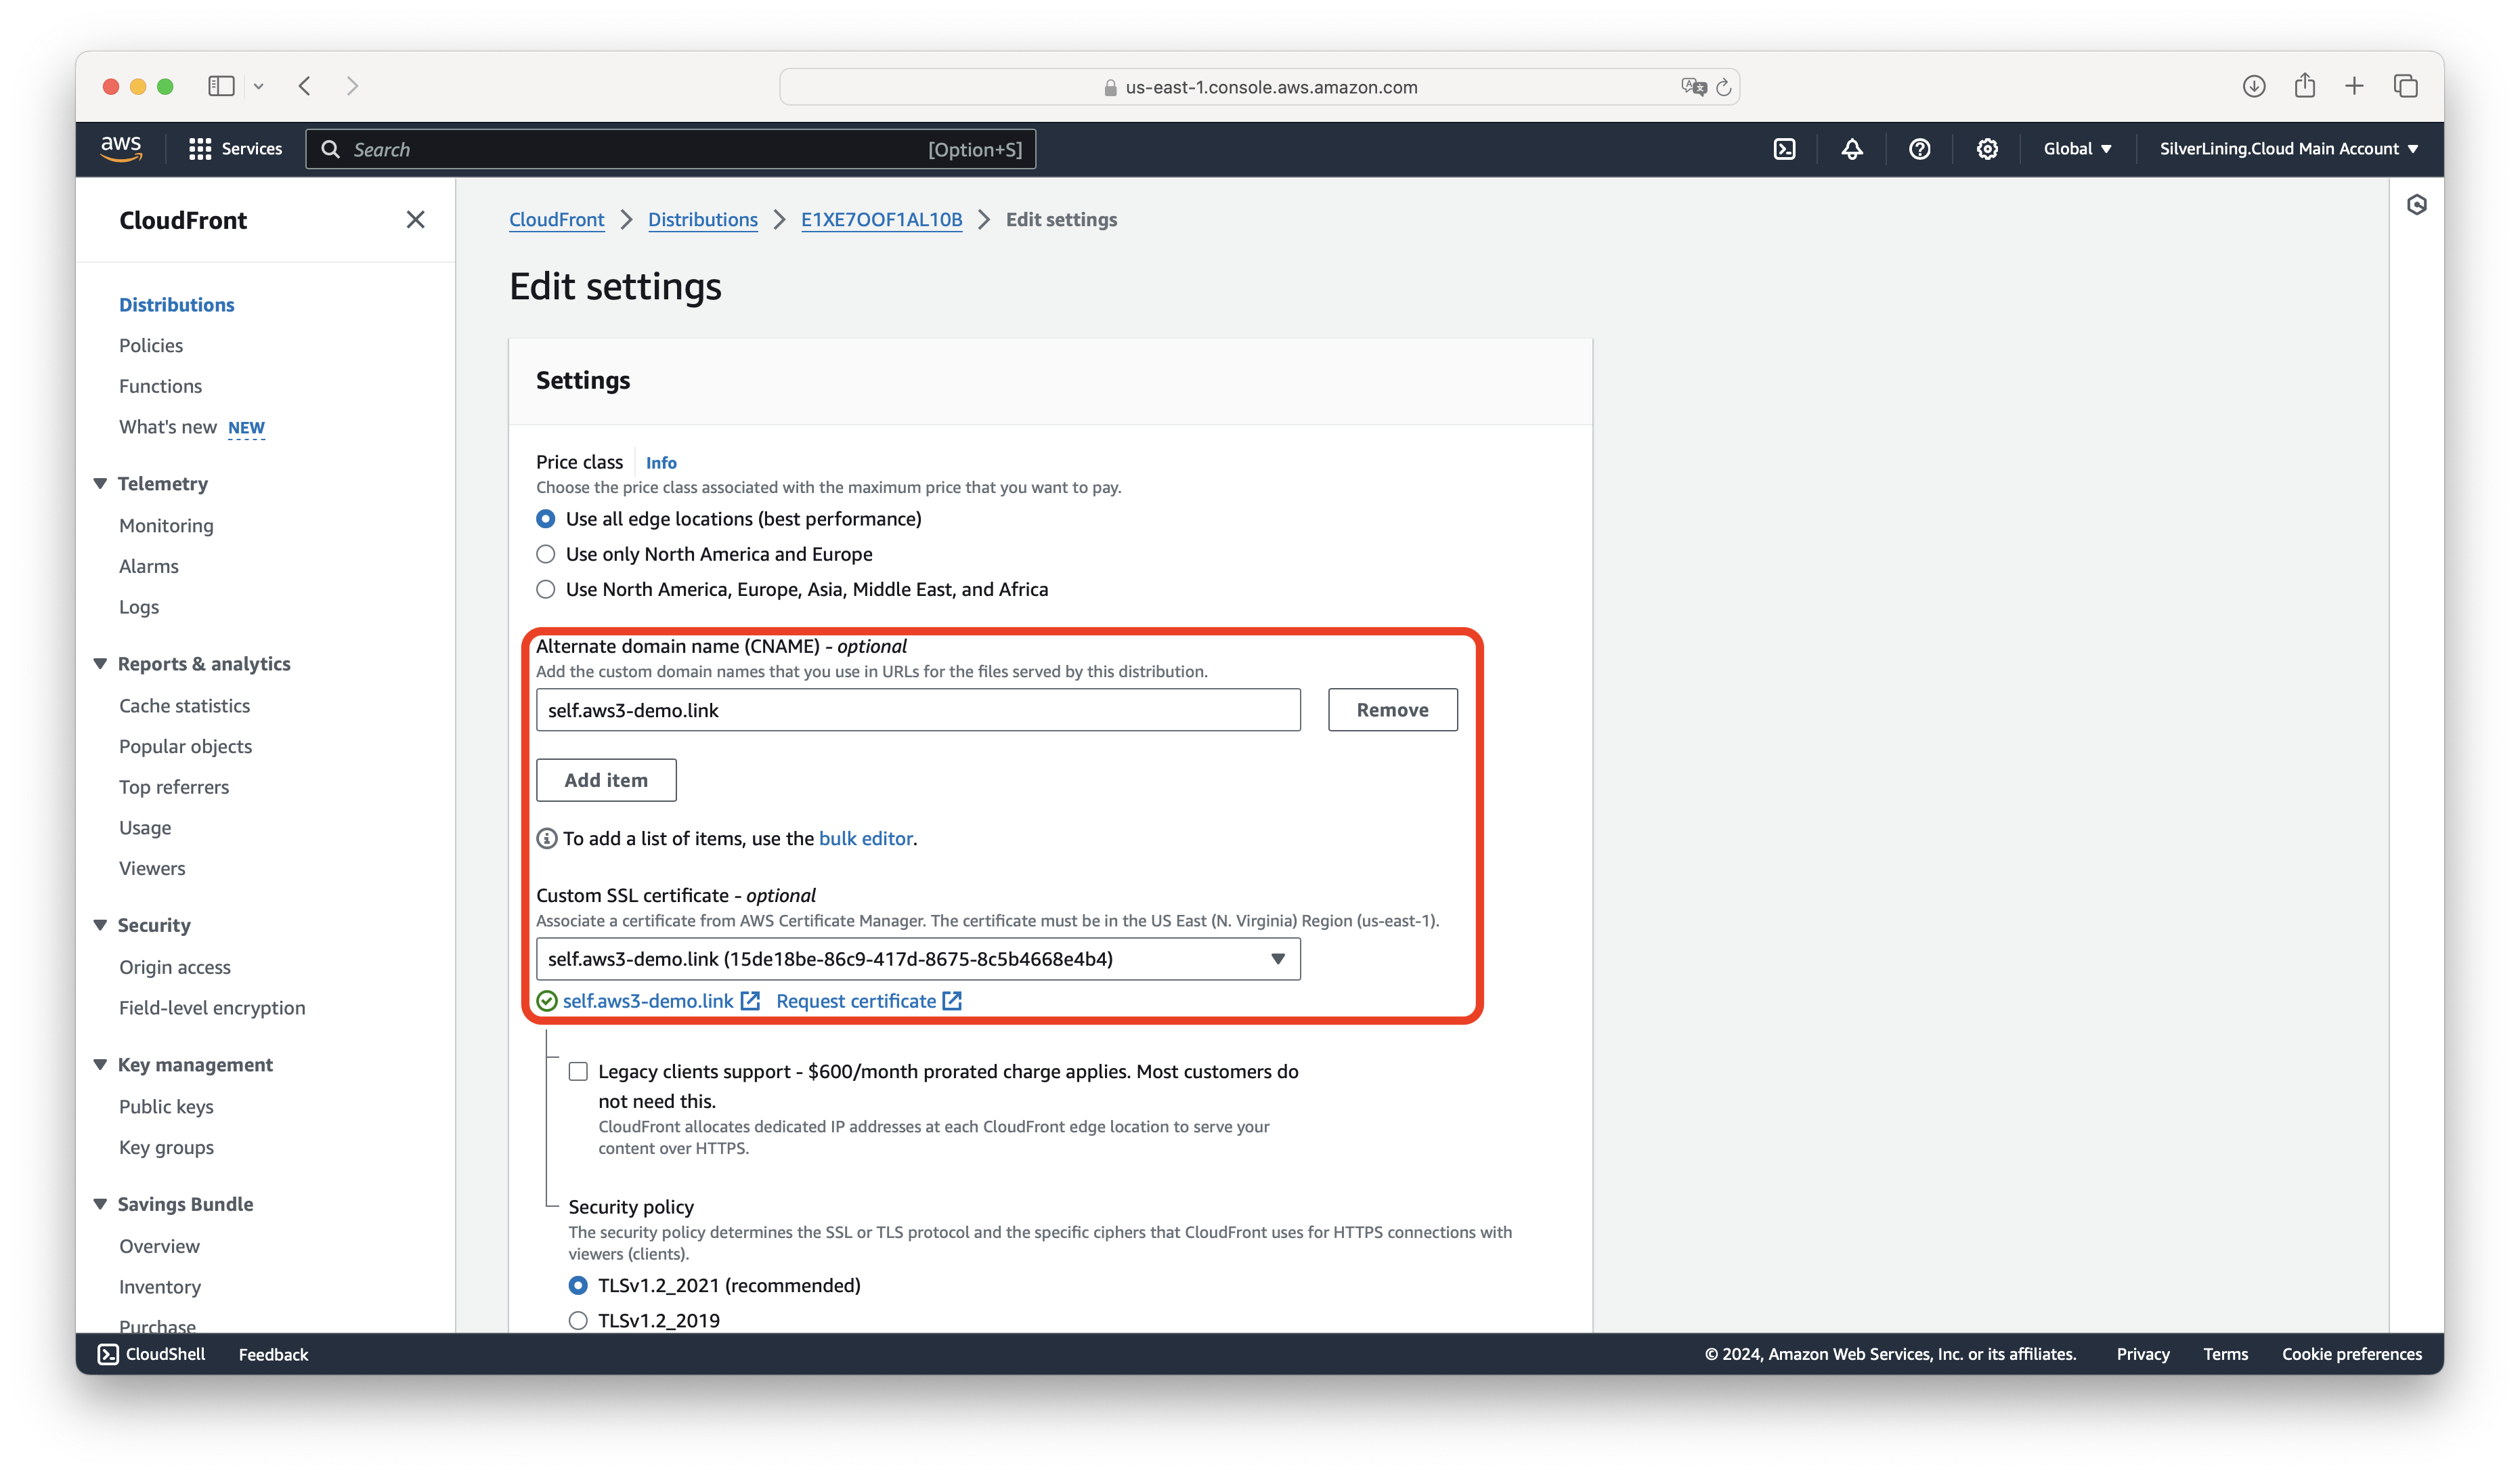
Once the deployment is complete, the CloudFront distribution will be available at this subdomain. Copy the distribution domain name for the next step.

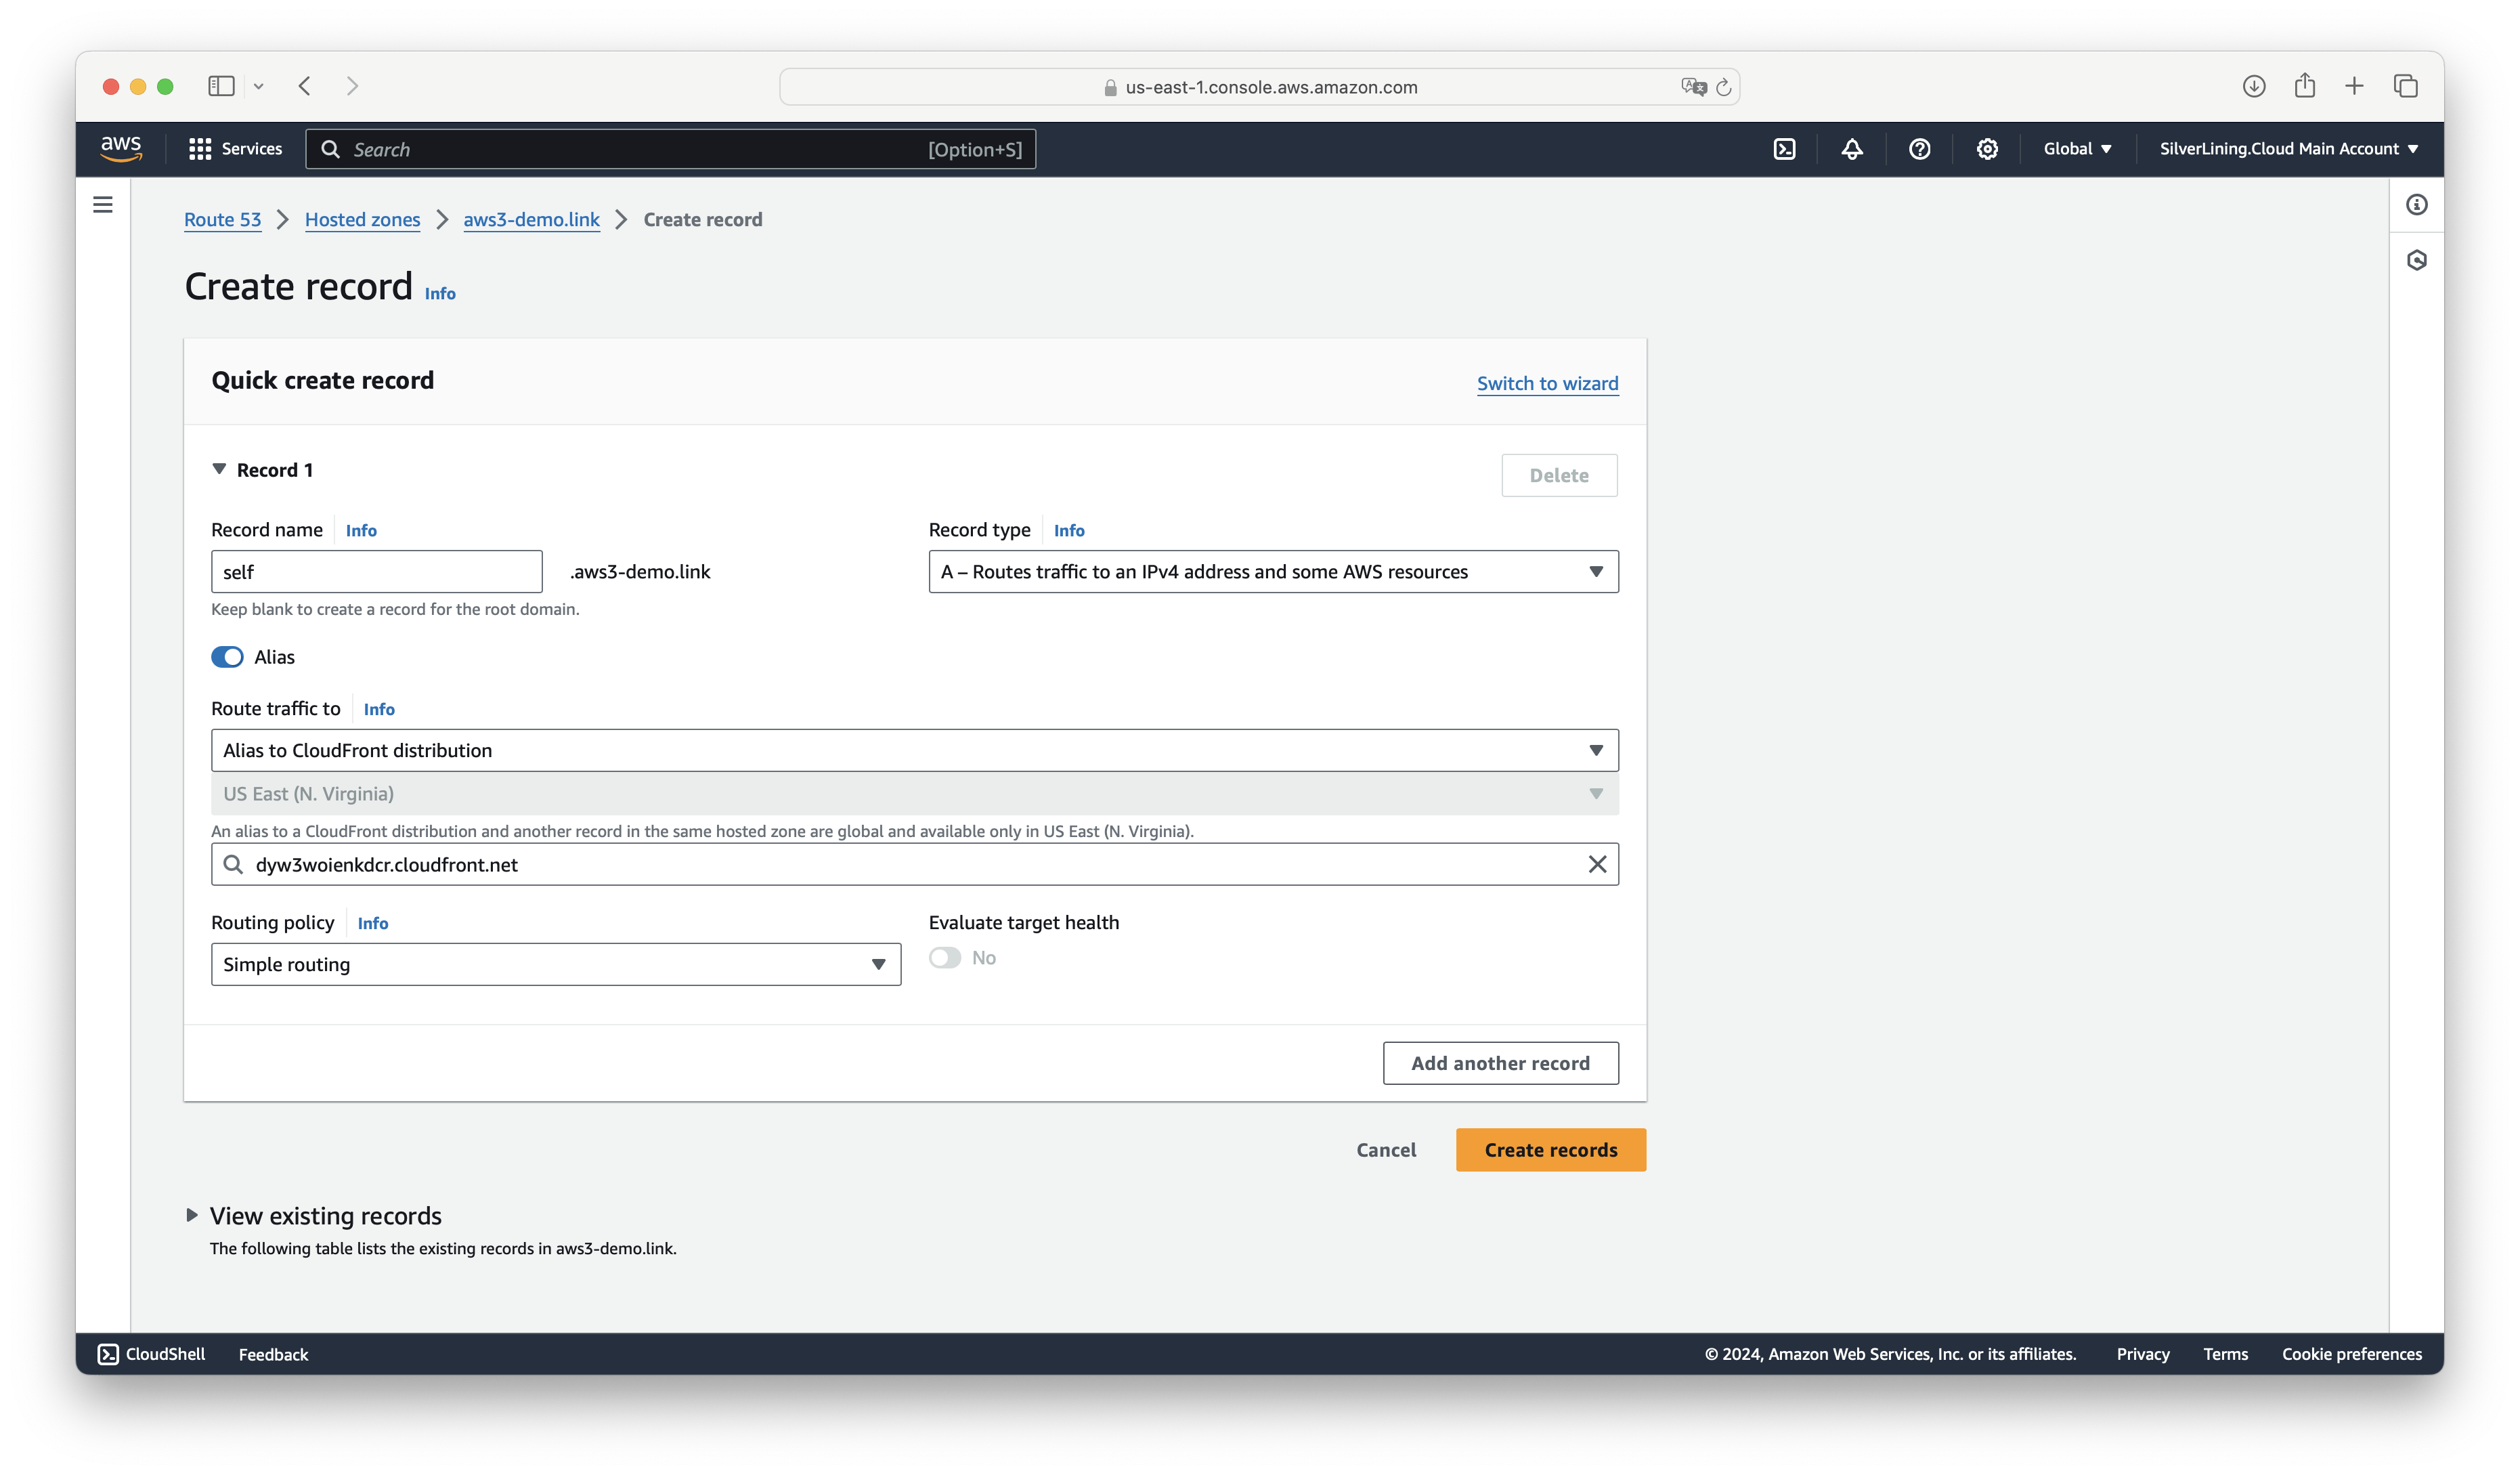
In the next step, we need to route the traffic from the subdomain to the CloudFront distribution. Go to your domain management tool (in this tutorial, we have the domain configured in AWS Route 53). Create a record for the sub domain and point it to the CloudFront distribution.
Finally, we need to update the website domain in the set-settings Lambda function. (See section "Customize your Experience" below.
File Sharing Workflow
This section explains how the s3ndless web interface works for uploading and downloading files.
- Deploy the Stack
First, you must deploy the CloudFormation stack. (See Deployment section.)
This will create all required resources, including a CloudFront URL where the web app is hosted. - Access the Website
The main upload page is available at the root of the CloudFront domain (index.html).
This page allows users to: - Upload one or more files.
- Set expiration limits (by hours or download count).
- Optionally protect downloads with a password.
- View a list of currently active file links.
- Optional: Upload Page Protection
You can enable Basic Auth (username/password protection) for the upload page.
This is configured in the set-settings function (upload_password_required and upload_password). - Upload Files
- Users can upload one or multiple files.
- If multiple files are selected, they are automatically zipped before upload.
- After upload, users receive a download link they can copy and share.
Download Files
Recipients open the shared link in their browser.
If the upload was protected by a password, they must enter it before downloading.
- File Expiration
- Files can expire either by time or download limit.
- When a file expires, it is removed from the active links database.
- The file itself is not deleted from S3, only made inaccessible via the public download link.
Additional Notes
- The frontend is static, hosted on CloudFront with S3 as the origin.
- All uploads and downloads are securely processed using signed URLs, so S3 remains private.
- No permanent backend server is required — everything runs serverlessly via Lambda, S3, and DynamoDB.
- There is no signup or account system. Access control is handled via secret headers (API) and optional upload page password (frontend).
- If a user opens an expired or invalid link, a friendly error page is shown (customizable via set-settings).
Customize Your Experience
To change the look, behavior, or texts of your s3ndless instance, you can change its configuration parameters at https://us-east-1.console.aws.amazon.com/systems-manager/parameters/?region=us-east-1&tab=Table
Common configuration changes:
- Enable password protection for your upload page: Change the value for "s3ndless/upload_password_required" to "true"
- Change website authentication password: "s3ndless/upload_password"
- Change Website Domain: Enter new domain name at "s3ndless/website_domain"
API Usage
This section explains how to interact with the S3ndless API. The API lets you upload files, generate download links, track usage, and manage link data. The endpoints make it easy to integrate s3ndless into your existing cloud environment or custom application. Replace <CloudFront-Domain> with your actual CloudFront domain (e.g. d1i4ws38emn0dh.cloudfront.net) from your deployed application stack.
This endpoint creates a temporary upload link (pre-signed URL) so you can upload a file to S3.
URL endpoint: https://<CloudFront-Domain>/api/web/get-upload-url


Method: POST


"header": {
  "Content-Type": "application/json",
 "X-Allowed-Via": "s3ndless-cloudfront-secret"
}


"body": {
  "content_type": STRING,
  "expiration_downloads": NUMBER,
  "expiration_hours": NUMBER,
  "password_hash": STRING,
  "salt": STRING,
  "upload_password": STRING
}
Required:
"content_type": MIME type of the file (e.g. image/png)
"expiration_downloads": Max number of times the file can be downloaded
"expiration_hours": How long (in hours) the file is available
Optional:
"password_hash": SHA256 hash of the download password (if needed)
"salt": Salt used to hash the password
"upload_password": Needed if uploads are protected with a password
Response:
{
  "upload_url": STRING,
  "file_key": STRING
}"upload_url": Use this to upload your file.
"file_key": Internal key to identify files, needed for downloads.
Code Example (Python):
import requests
import json

# Step 1: Get the upload URL
url = "https://d1i4ws38emn0dh.cloudfront.net/api/web/get-upload-url"
headers = {
    'Content-Type': 'application/json'
}
body = {
    "content_type": "image/png",
    "expiration_downloads": 10,
    "expiration_hours": 24,
}
response = requests.post(url, headers=headers, data=json.dumps(body))
upload_info = response.json()

upload_url = upload_info["upload_url"]
file_key = upload_info["file_key"]

# Step 2: Upload the local file to the presigned URL
file_path = "/Users/michael/Downloads/Diagram S3ndless with planes.png"  # Change this to your actual file path
with open(file_path, 'rb') as file_data:
    upload_response = requests.put(
        upload_url,
        data=file_data,
        headers={
            'Content-Type': 'image/png',
            'Content-Disposition': f'attachment; filename="{file_path.split("/")[-1]}"'
        }
    )

# Step 3: Print result
if upload_response.status_code == 200:
    print(f"Upload successful! File key: {file_key}")
else:
    print(f"Upload failed: {upload_response.status_code}")
    print(upload_response.text)
Code Example (Node.js):
const axios = require('axios');
const fs = require('fs');
const path = require('path');
// Step 1: Get the upload URL
async function getUploadUrl() {
    const url = "https://d1i4ws38emn0dh.cloudfront.net/api/web/get-upload-url";
    const headers = {
        'Content-Type': 'application/json',
    };
    const body = {
        content_type: 'image/png',
        expiration_downloads: 10,
        expiration_hours: 24,
    };
    const response = await axios.post(url, body, { headers });
    return response.data;
}
// Step 2: Upload file as a Buffer (not a stream)
async function uploadFile(uploadUrl, filePath) {
    const fileBuffer = fs.readFileSync(filePath);
    const fileName = path.basename(filePath);
    const response = await axios.put(uploadUrl, fileBuffer, {
        headers: {
            'Content-Type': 'image/png',
            'Content-Disposition': `attachment; filename="${fileName}"`,
            'Content-Length': fileBuffer.length,
        },
    });
    return response.status;
}
// Main function
(async () => {
    try {
        const filePath = "/Users/michael/Downloads/Diagram S3ndless with planes.png"; // change this
        const { upload_url, file_key } = await getUploadUrl();

        const status = await uploadFile(upload_url, filePath);

        if (status === 200) {
            console.log(`Upload successful! File key: ${file_key}`);
        } else {
            console.log(`Upload failed: HTTP ${status}`);
        }
    } catch (err) {
        console.error('Error:', err.response?.data || err.message);
    }
})();
Troubleshooting
Changes to Settings Don’t Show Up
After making changes to the set-settings function, click Deploy, then Test in Lambda. This writes the updated settings to config/settings.json in S3. Make sure your browser does not cache old values (use incognito mode).
"message": "Invalid Input: The request contains incorrectly formatted parameters"
This error message means that the body parameters you have passed are malformed. Please follow the instructions given in the endpoint descriptions. Common issues include forgetting to add a comma (',') after every parameter line or missing a parenthesis somewhere.
"message": "Endpoint request timed out"
You receive this error message when the code execution exceeds the maximum timeout (usually 29 seconds).
Setting Up CNAME or A Record for the Apex of a Domain
When integrating your base domain (e.g., example.com) with our service, you may need to set a CNAME or A record to redirect to a URL at the apex of the domain. This step is not necessary if you only intend to integrate a subdomain (e.g., link.example.com) with our service.
Most domain registries (such as GoDaddy) do not allow setting a URL as the destination for the apex of a domain. However, there are workarounds to address this issue. We recommend using AWS Route 53, a DNS hosting service that allows you to configure the records as required by our setup. It offers a way to keep your domain registered with your current registry while managing the DNS through AWS. For guidance on integrating AWS Route 53 with your domain, please refer to this blog post: https://jryancanty.medium.com/domain-by-godaddy-dns-by-route53-fc7acf2f5580.
Alternatively, you can set up a redirection to our backend for the "www" subdomain and then redirect from the apex domain to the "www" subdomain. This approach can be implemented using a service like http://wwwizer.com.
How can I cancel my subscription?
To cancel your subscription, follow these steps:
- Go to the AWS Marketplace Console at https://aws.amazon.com/marketplace/library. Ensure that you are logged into the account that is subscribed to the product you want to cancel.
- Find the product you want to cancel and click on 'Manage.'
- Click on 'Actions' and then select 'Cancel subscription.'
For more detailed instructions, visit the AWS Marketplace Buyer Guide at https://docs.aws.amazon.com/marketplace/latest/buyerguide/cancel-subscription.html.